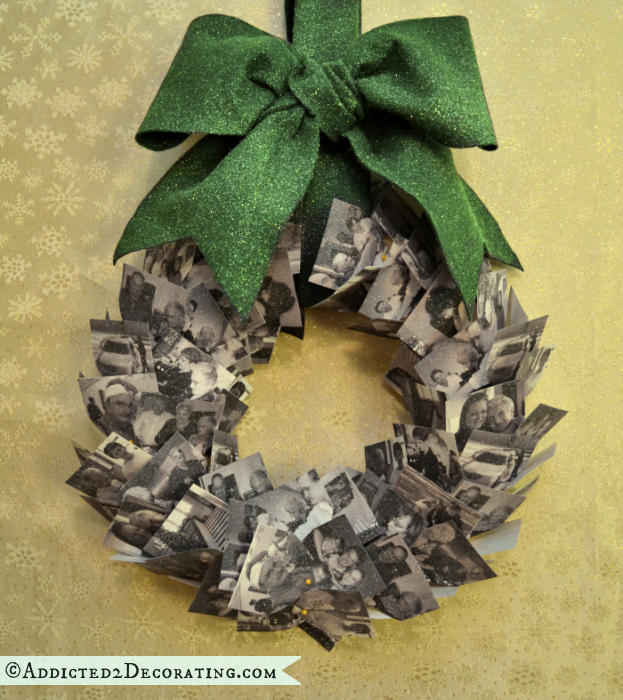
Upcycled Magazine Wreath
If you’re anything like me, you’ve got a stack (or several) of magazines that you really have no use for anymore, but you just can’t bring yourself to throw them out. This weekend, I put some of those colorful pages of three magazines to use and made this upcycled magazine wreath…
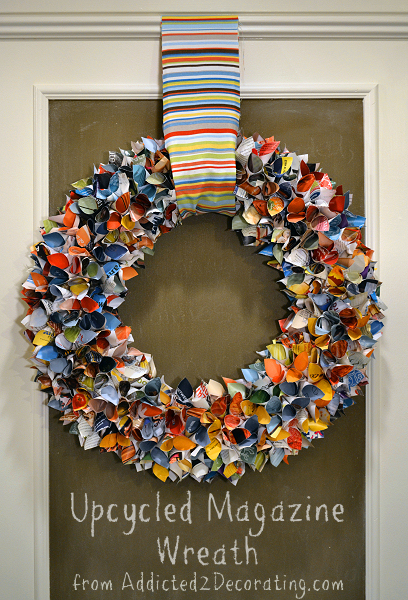
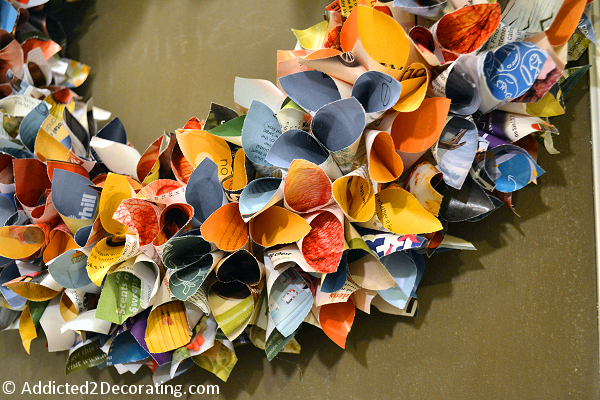
I just love all of those gorgeous, vibrant colors! And it just so happens that the colors I’ve used in my condo–teal, turquoise, orange, yellow, and apple green–are incredibly popular in advertising right now.
Making the wreath was incredibly simple, but very time-consuming. It’s the perfect project for those days when you want to do something creative, but you don’t want to have to do a lot of thinking. Perhaps settle in with a good movie or two (or a great series…Downton Abby, anyone? I’m on my third time through now…LOL), and do a simple project.
Here’s how I made mine…
Tools & Materials:
- About three magazines,
- Glue stick,
- Paper cutter or scissors,
- 3/4″ dowel rod or something else cylindrical in shape and about 3/4″ in diameter,
- Something to crease the paper with (bamboo skewer or credit card works well),
- Hot glue gun and glue sticks,
- Wreath form (I used an 18-inch form),
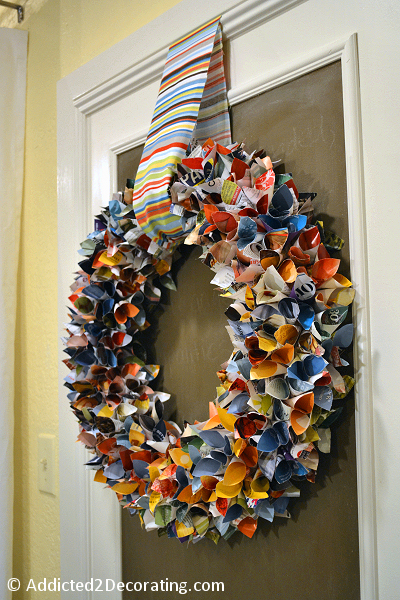
- Strip of fabric for hanger.
Instructions:
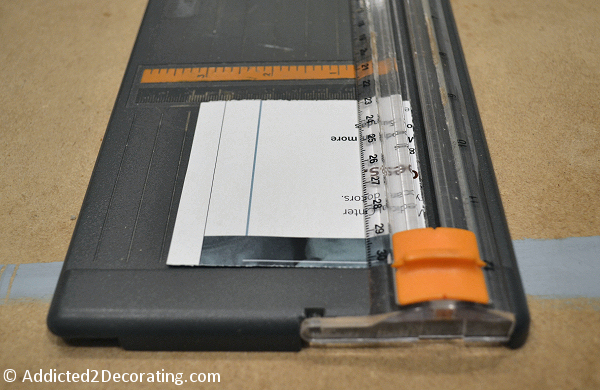
First, cut lots and lots of 3″ x 3″ pieces from the pages of the magazines. I didn’t count the squares, but you’ll probably need at least a couple of hundred…probably more. If you want to do a wreath that includes only one or two colors, of course you’ll need many more than just three magazines.
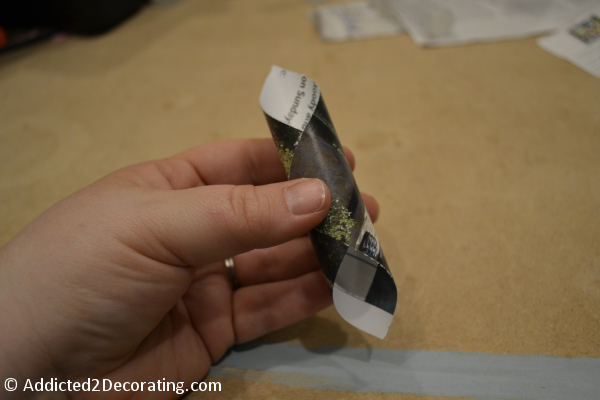
Now take your dowel rod (or other cylindrical item–I used a container that a kitchen gadget came in) and roll the squares point-to-point around the dowel. Be sure that the colorful part (the part that you want to show the most) is on the inside. Use a glue stick to secure.
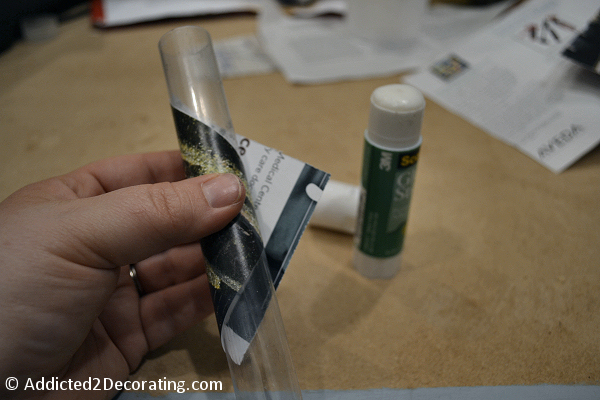
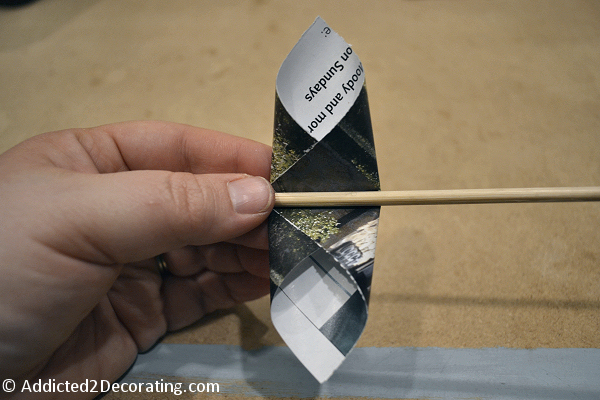
Next, slip the rolled paper off the dowel…
…and use an item to crease the paper in the middle. I used a bamboo skewer for part of them, and a credit card for the other half. Both worked fine.
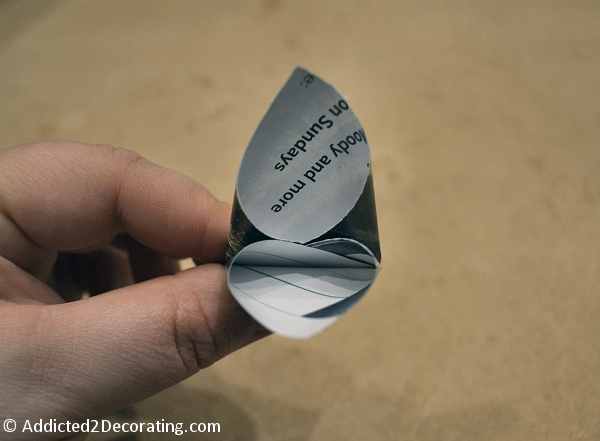
Then fold the paper together in the middle.
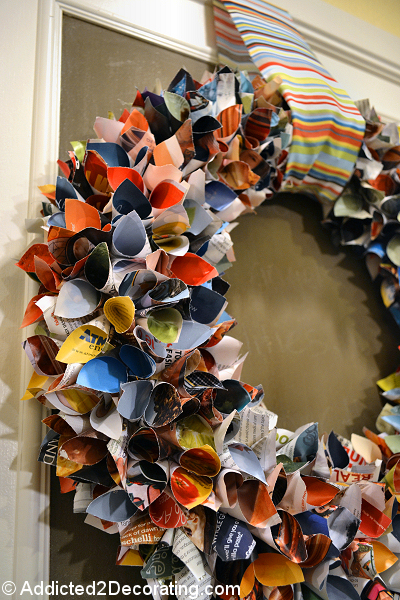
Once you have a couple of hundred of those, you can glue them onto your wreath form. I did mine randomly, but you can do them in a pattern if you’d like.
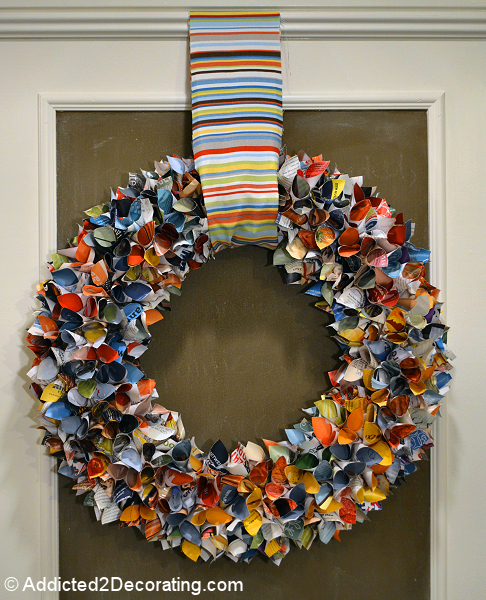
I love all of that color! I think it’s the perfect summer wreath. I know…it’s just now spring, but here in Texas, it’s starting to feel like summer already.

Addicted 2 Decorating is where I share my DIY and decorating journey as I remodel and decorate the 1948 fixer upper that my husband, Matt, and I bought in 2013. Matt has M.S. and is unable to do physical work, so I do the majority of the work on the house by myself. You can learn more about me here.

Fantastic idea! Will definitely give it a try.
Love it!! Looks so colourful…did you use hot glue? I used pins on my burlap wreath, do you think pins would work too? Would love to know your opinion.
I used hot glue, but I’m sure pins would work also.
Love this! I can’t bear to throw out old mags, either. Question – what type of wreath form did you purchase? Foam or wire??
I used the kind that’s made of straw and generally wrapped in plastic.
Beautiful! And I love all the colors.
I love the colors!!! I have to go to the doctors today, maybe there will be some magazines they don’t want since I don’t have any. I even have some stripped material from a quilt I am making!!! SCORE!!! The only problem I see is that I am now wanting to paint the front door. It is a nasty drab brown that I hate. I just can’t pick a color. I love color!!!
Ok, now I want to paint my ugly red brick. you are so bad for me!!!
Do u just glue them by the folded edge to the wreath? Just glue on the part u folded? How do u keep
the edge from showing? I wish there was a pic of the process, how u started gluing and what it looked
like. Sorry but I am visual. Thank u so much
Yes, I just put hot glue on the fold and stuck it to the wreath form. I used a straw wreath form. I just started gluing on the top of the wreath form, and continued around in a very random fashion. There was no pattern to it–just random gluing with the goal of covering all of the straw wreath form that would show once it was hung on the wall.
Have you ever tried this with a foam wreath? or do you only use straws?
I almost always use straw wreath forms because they’re so cheap. Styrofoam is expensive.
This is the perfect Downton Abbey wreath! I’ve watched it more than a few times myself!
Pinning this!
Kelly
I HAD to pin that! So awesome, so cute, perfect for Spring…wish I had saved more magazines ;). Maybe I’ll have to treat myself to a few…you know, for the project’s sake :).
WOW, this is SO creative…and I’m staring at a stack of magazines looking for a better ending than a recycling bin! Beautifully done!
What a great idea!! Thanks for sharing…I can’t wait to make one! :))
WOW!! This is FABULOUS! I found your cute blog through Eclectically Vintage’s facebook share of this wreath. How fun! I’m your newest follower and I look forward to spending more time here at Addicted 2 Decorating!
Oh, I just LOVE it!!! So creative and the colors are my favorites!! Pinning it!!
Jill
Oh, I just LOVE it!!! So creative and the colors are my favorites!! Pinning it!!
Jill
In Texas with you, gal and think this would be beautiful indoor wreath for me. I am not too far from the Gulf and think the humidity would destroy the paper. Love it.
kristi, you are reading my mind! i’ve been fiddling with magazine pages doing a riff on the coffee filter wreath thing. that is simply endless. like the simplicy of this idea better. we are constantly overrun with magazines and i figured there’s gotta be SOMETHIN’ to make out of all that pretty paper! thanks so much!
I saw this late last night so I went out and bought a few things e.g. pins etc and now I’m going to be spending Good Friday folding paper. I was hoping to go for a black and white theme but I think I’ll go with something similar to what you did. I’m going to use a ball instead of a wreath so I’m hoping it’ll work. Thanks for posting your tutorial its helped me heaps.
Gorgeous. This is such a creative idea. I love the all the colors.
just discovered this site this morning……your ideas are awesome. I’m going to start buying stryrfoam balls now
as I have a front double doors.Do you have any idea how many of each size you used? Starting the magazine
wreath today for my breakfast room. Martha’s magazine has great color pages.
I simply LOVE this!! Such a great idea for old magazines. I’m featuring you tomorrow 🙂
I’m new to your blog and am loving what I’ve seen so far! This wreath looks like fun and the colors are fantastic. Thanks for sharing.
Pretty wreath, I’m pinning this!! It will be a great project for Craft Day with my grand daughter. Thank you so much for sharing!
I love this idea! I would love to feature this on Reduce, Reuse, Upcycle. Feel free to stop by and grab a featured button. Thanks!
Rach may like?
LOVE your wreath! You had me at Dowton Abby – on my second time around ! Happy crafting!
So for those of us in the world who DON’T have pretty decorating magazines lying around, but do have magazines lying around… (Game Informer? lol) I’m thinking spray painting the pages might give more control over the colors and such. And this looks way easy, which is a huge yay for me.
I am so anxious to try to make this wreath. In our women’s group, we sell our used magazines. Now I can promote what the ladies can do when they have finished with them. I would like to know what I can make from old greeting cards rather than toss them out. Any ideas on that? Thanks.
If your greeting cards have a centered graphic on the front, you can cut them in half & make small gift boxes (for earrings or a necklace). If the saying is centered on the inside of the card, even better. When I made them for our church bazaar, we just used cards with blank insides. I have included a link with good step by step instructions. She uses doubled sided tape, I used a scrapbooking liquid glue pen (has a roller ball tip like a ball point pen) which dries quickly & held the cuts end together quite well. http://www.craftypod.com/2007/10/29/how-to-make-a-gift-box-from-an-old-greeting-card/
I am going to try using a foam pipe insulator rather than a wreath. They sort of look like black pool noodles. You can find these in any hardware store for around .99. Just tape the ends together to make a circle.
Love this! Thank you so much for sharing the tutorial! I’m pinning now 🙂
My Michael’s doesn’t sell straw wreath forms. Do you think the hard styrofoam would work?
Do you think a hard styrofoam wreath form would work? My Michael’s doesn’t carry the straw kind.
Yep, that should work just fine!
Sorry, didn’t mean to comment twice.
I discovered your blog a day or two ago and I’m pinning like CRAZY. It’s like Pinterest was invented for your blog. I love almost everything!
Haha! What a wonderful compliment, Heather! Thanks so much!
Dumb question: Did you do the back, too?
No, just do any parts that show from the front.
What/ how much fabric did you use for the hanger? Also how was it attached?
Just wanted to know if you glue where they meet after you fold them?
No, I didn’t glue them where they met after folding.
Thanks for getting back to me!
WOW! I love this. I just hope I have the patience like you have
I love love love your wreath!! I too am a magazine fanatic (I actually just threw away a huge stack of old Cosmo’s (big hair and animal prints, whoo!) that someone was giving away on Craigslist) and hate to throw them away and can’t give them away because I tear stuff out. Anyhow, now I know what I can do with those lovely vibrant backgrounds! Thanks for the wonderful idea! Also love your laundry turned hallway project! You really did a nice job on a small space! Merry Christmas!
LOVE YOUR DECORATING IDEAS AND YOUR CREATIVITY, WOULD LOVE TO HANG OUT WITH YOU, TO FEED OFF YOUR IDEAS. I’m ALWAYS LOOK FOR NEW IDEAS. tHANK YOU FOR SHARING YOUR IDEAS.
HI this is great – so good that I have started making my 200 odd elements of the wreath – but I don’t understand how you attach them to the wreath form. Can you give an uncrafty person some tips on how you actually fixed the individual pieces to a wreath form. And was it a wire wreath or just a cardboard circle? Thanks
I used one of those wreath forms made of straw, and I just glued the pieces to the wreath form using hot glue.