Our Music Room From Beginning To End
A couple of days ago, I posted the final before and after of the music room remodel. But just like the living room, a simple before and after didn’t seem to do justice to the process that this room has gone through over the last seven-and-a-half years.
The music room didn’t go through nearly as many changes and stops and starts as the living room. I never really seemed to get started on the music room, but I sure had lots of changing plans over the years! I did have a couple of major projects that I did and then changed my mind about, though.
One particular project (the pony walls) is still mentioned by readers who, to this day, wish I hadn’t changed it. But if you’ve read my blog for long, you know how that goes. Don’t hold on to anything too tightly, because it could all change at a moment’s notice until the room is finished. And even then, nothing is really safe. 😀
So here’s the process that the room went through over the years…
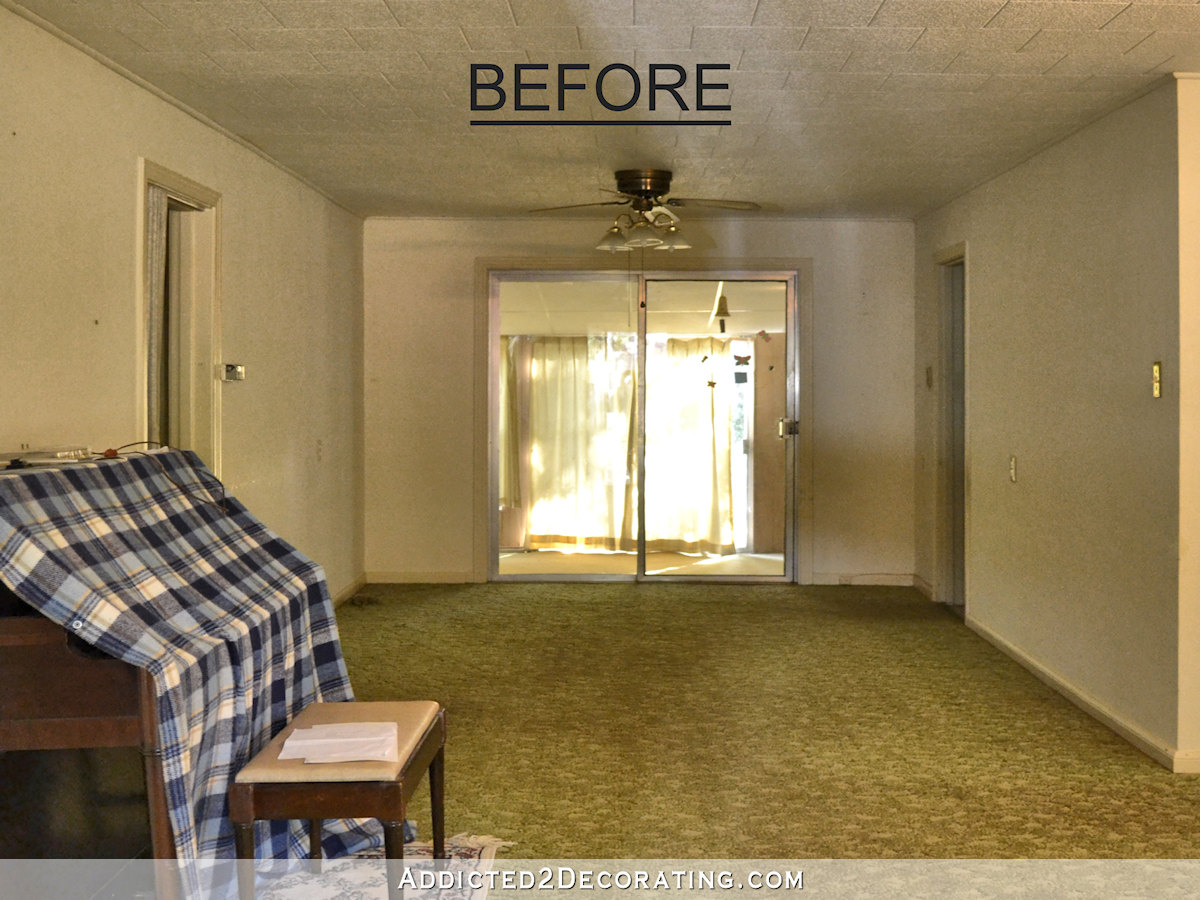
August 2013
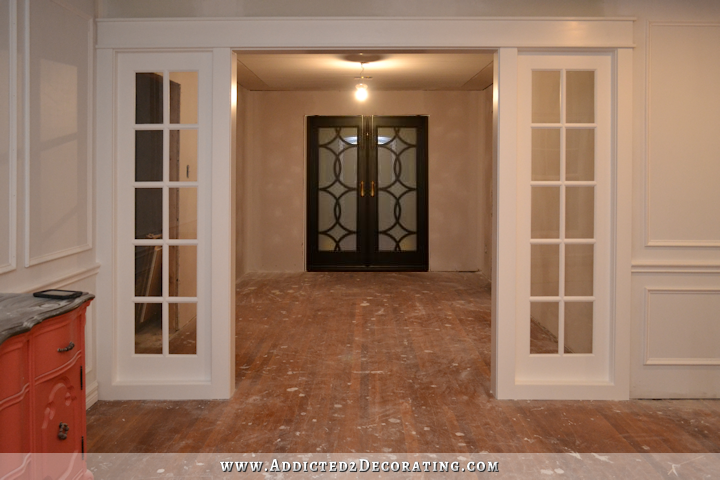
This is what the room looked like when we bought the house. Like most of the rest of the house, it had ivory walls, green carpet, and polystyrene tiles on the ceiling. The room also had sliding glass doors that led to the back room (i.e., the sunroom, which now houses our laundry area, and the rest is used for storage, tools, paints, etc.). The door on the wall to the left is the hallway (which was recently completed again, and you can see that here), and the doorway on the right leads to the kitchen (which has been finished for a while, and you can see that here).
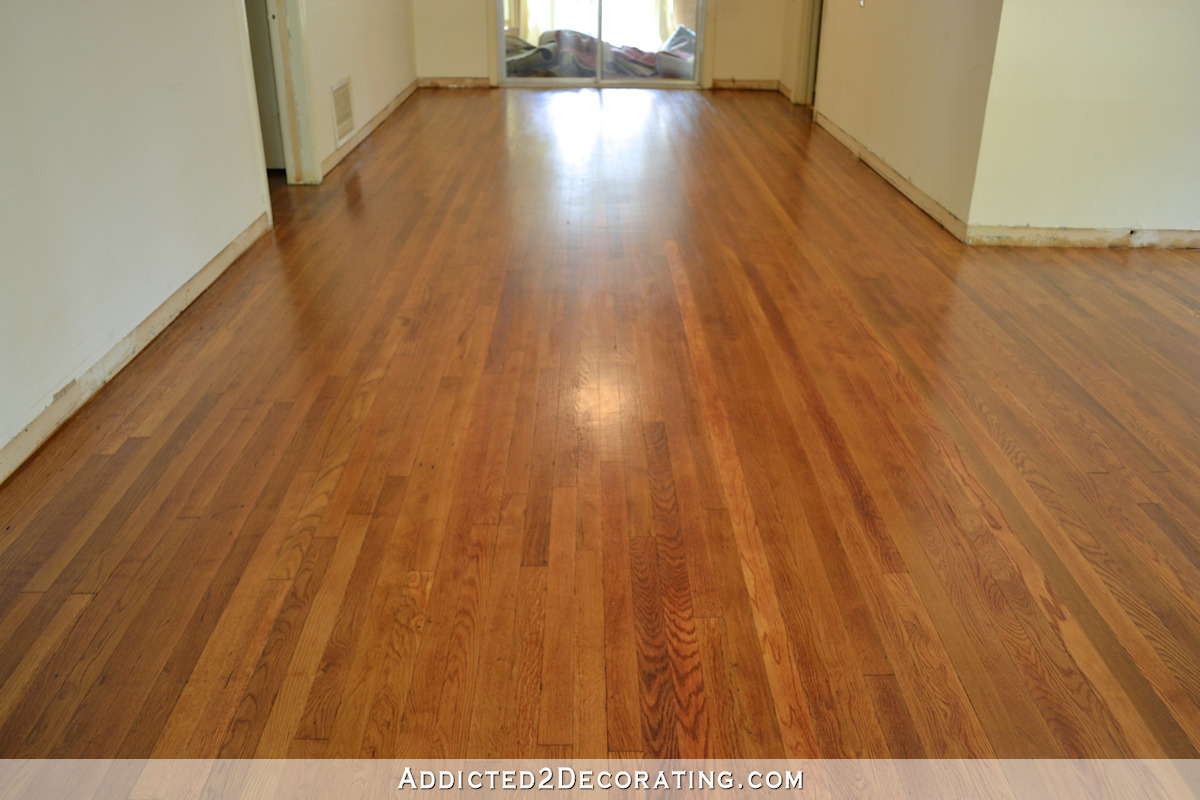
September 2013
The first thing I did in this room, just like the rest of the house, was to rip up the green carpet, carpet pad, and tack strips, and refinish the beautiful oak hardwood floor that had been hidden under and protected by the carpet for years. The floor was in beautiful condition, and this first time around, I refinished it with Waterlox alone.
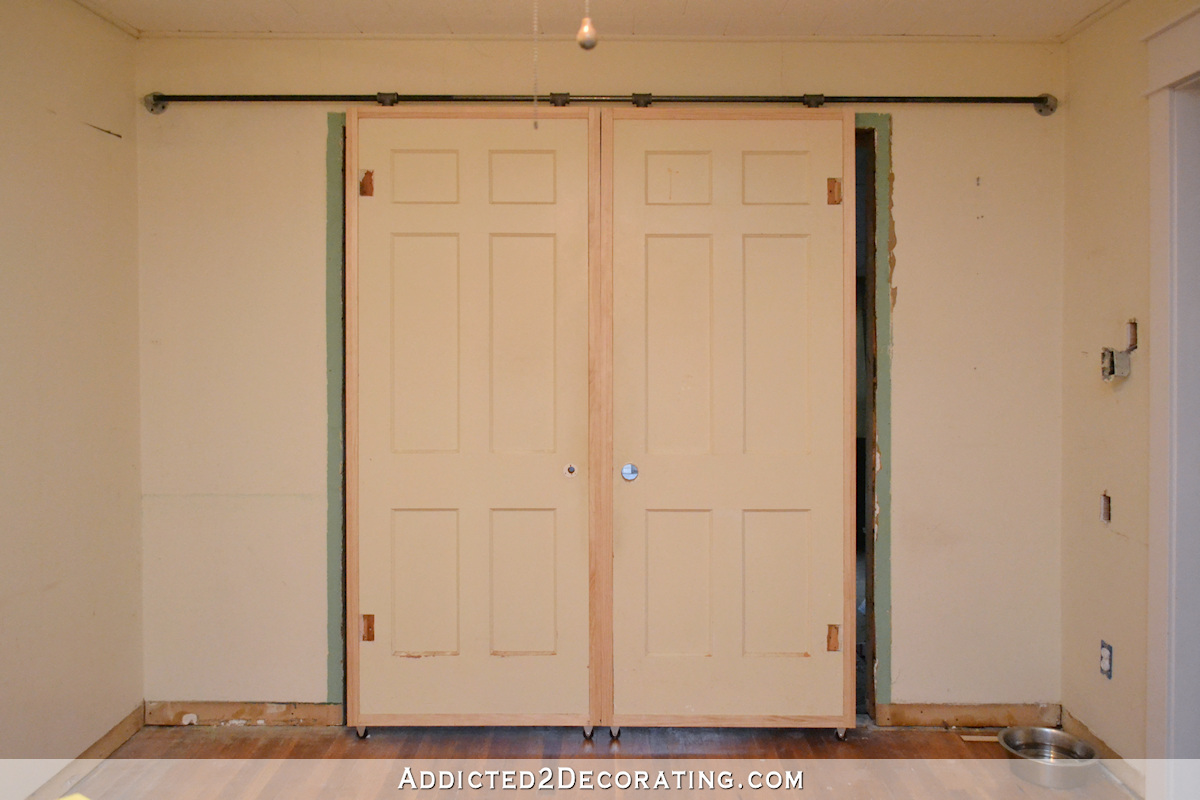
September 8, 2014
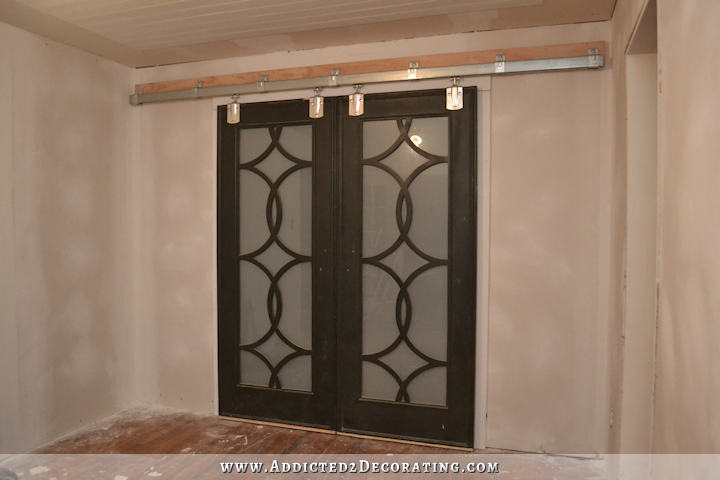
The room sat pretty much untouched for a year as I worked on the kitchen remodel. Then I finally decided that I wanted sliding doors to replace the sliding glass doors with sliding doors using two solid wood doors that I had removed from other areas of the house. While I was still deciding on what I wanted to do with the doors, I installed very inexpensive “barn door” type hardware made of plumbing pipes and casters on the doors since, at the time, actual barn door hardware (the nice kind) was quite expensive.
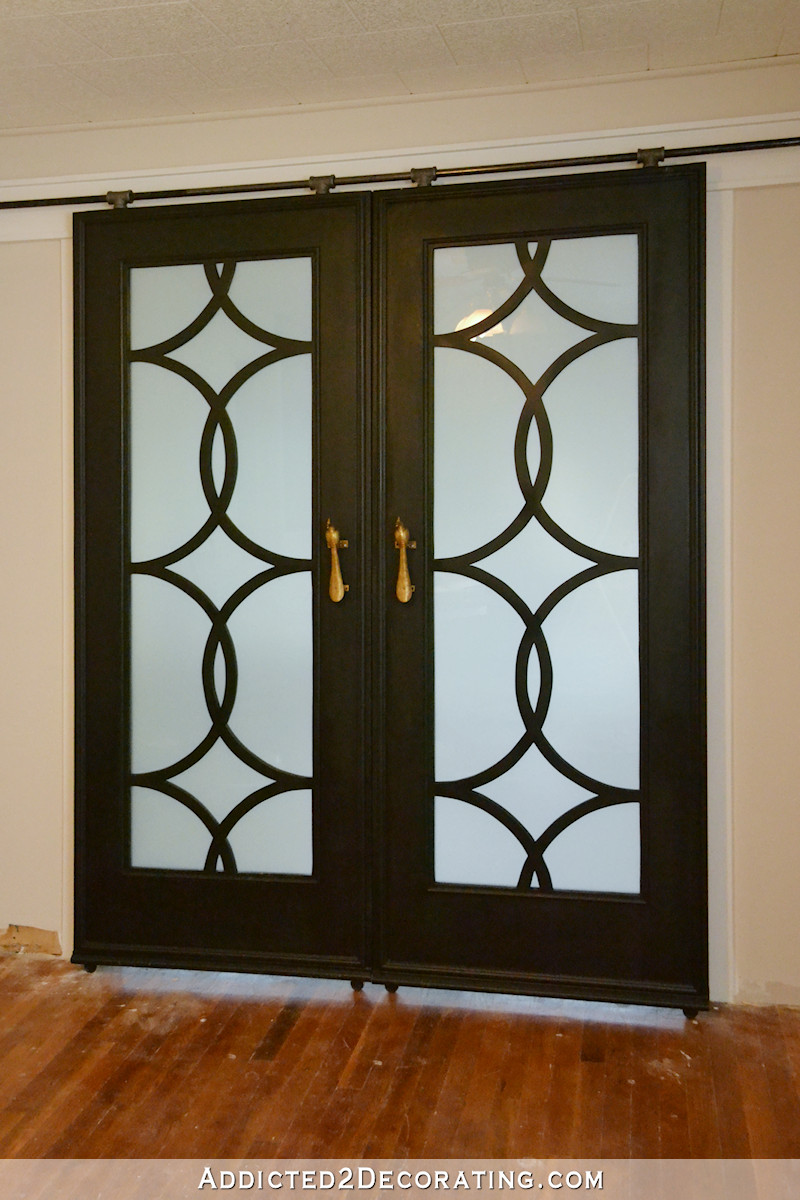
September 24, 2014
After considering several other designs, I finally decided on the final design for the music room sliding doors. I created the inner panels using 1/4-inch MDF and a jigsaw.
January 2015
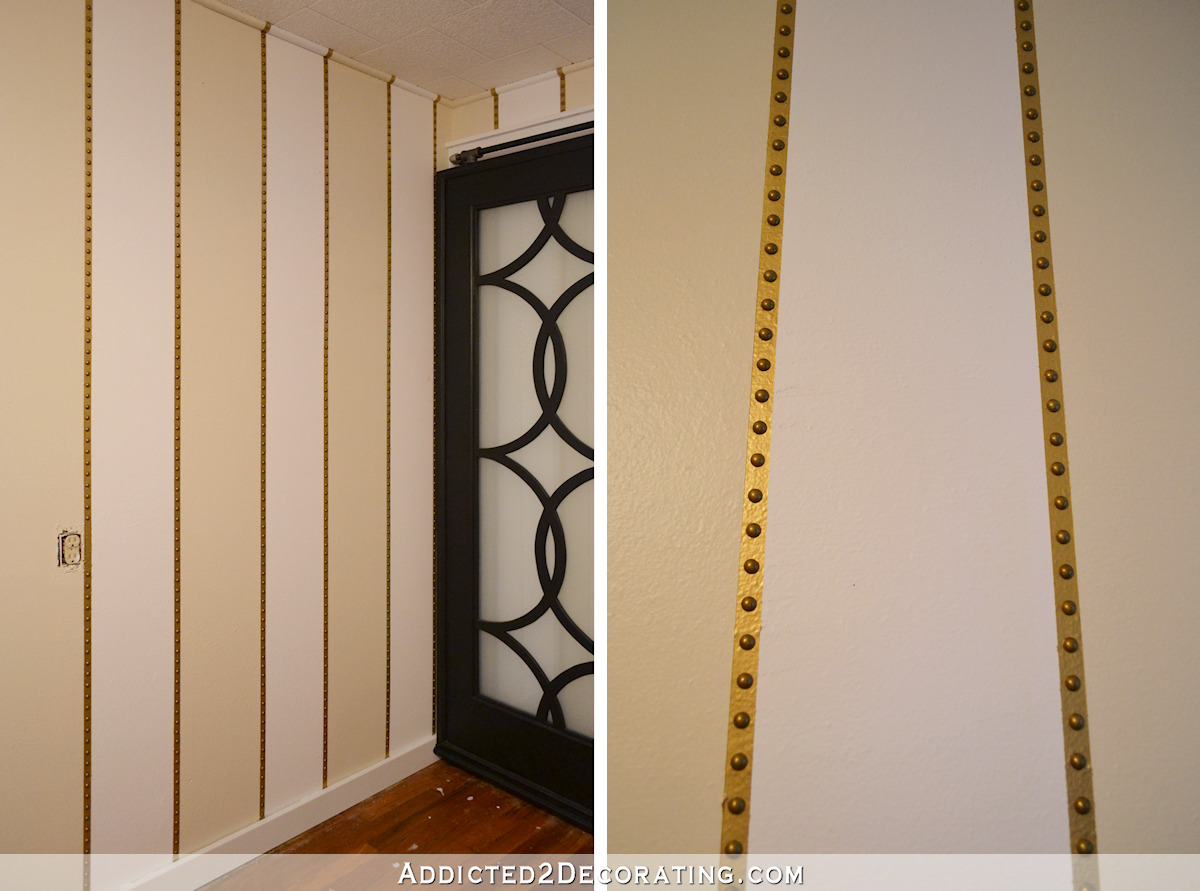
I thought I had a plan for the room — striped walls with nailhead detail. I loved the overall idea (and actually still do), but there were a few problems. First, I was still trying to find the right neutral. I don’t know if this was before the gray craze, or if the gray craze was already in full effect and I was still trying to buck that trend. But I do know that this brown-tone neutral just wasn’t working for me. (I have since found my neutral wall color — Benjamin Moore Classic Gray.)
But the main problem is that I jumped the gun on any kind of decorating because the room still had the original drywall, the original polystyrene tiles, and the original quarter round where those two things met. At that time, I was still hoping to avoid re-drywalling this room (I couldn’t), and I was still hoping that the ceiling drywall hidden by those polystyrene tiles would be in good shape (it wasn’t).
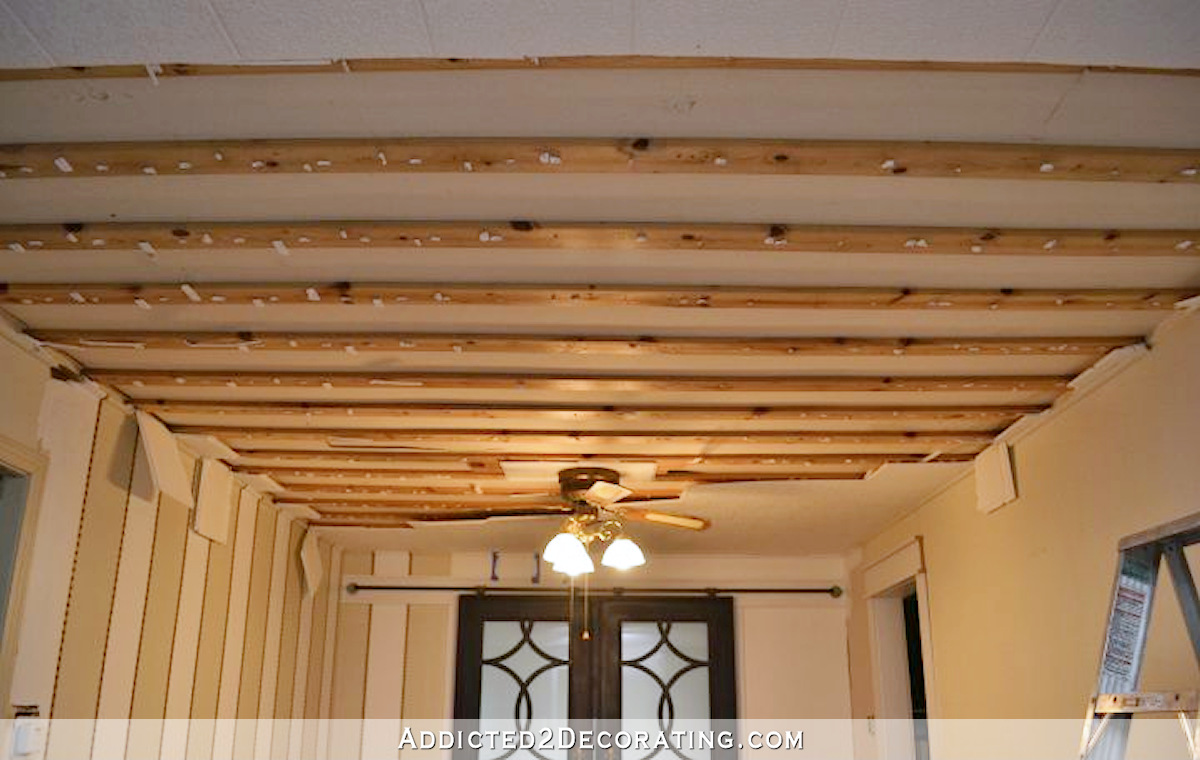
January 2015
About halfway through the striped wall project, I finally realized that it was pretty ridiculous to continue with hours and hours of work without knowing what I was dealing with beyond those ceiling tiles. So I ripped them down to find that they were hiding a big area of drywall rot where there had been a big leak in the roof.
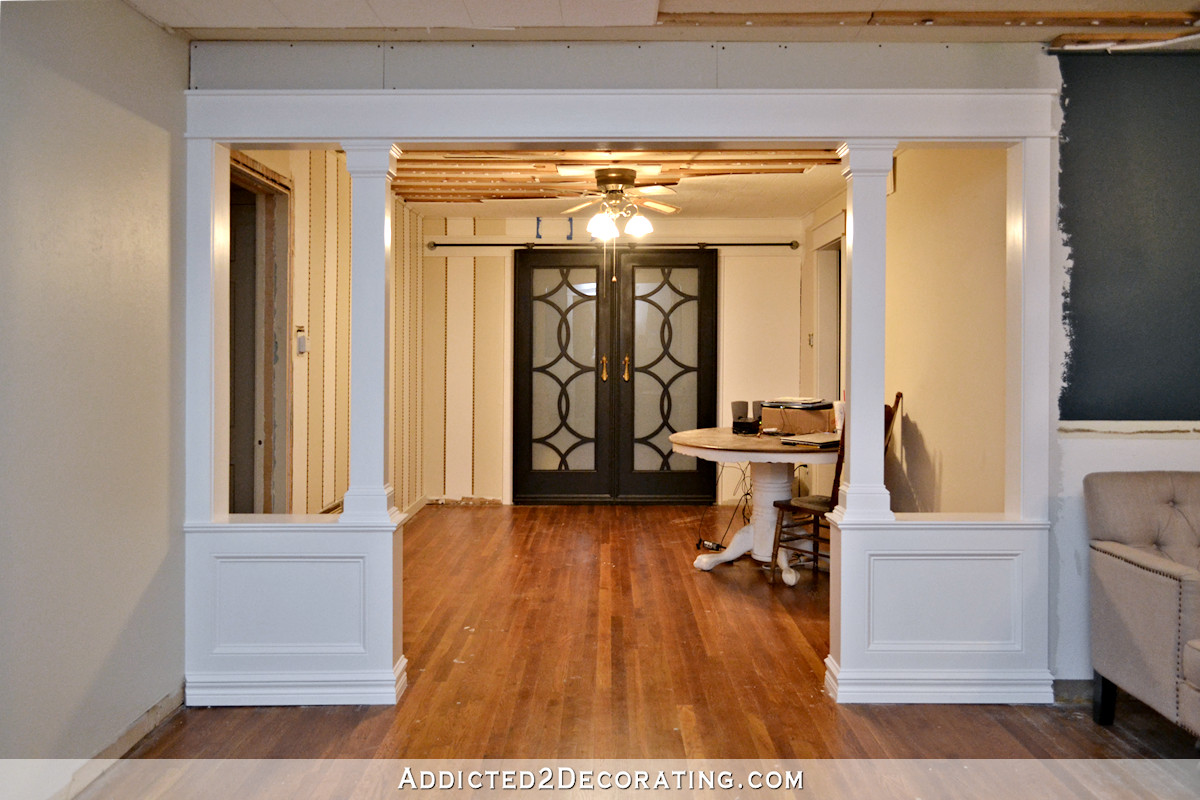
January 2015
This is when I built the pony walls between the entryway and music room, and this is the second most mentioned project that I ended up undoing later (second only to the bird and butterfly mural on the entryway wall). Can I tell you a secret? I regret undoing this project. I don’t think I’ve ever regretted scrapping and redoing a project, with the exception of this one. I know I had a reason for tearing these down that, at the time, seemed perfectly logical and reasonable. But these were pretty. And pretty perfect. And in hindsight, I wish I would have left them alone. Oh well. 🙂
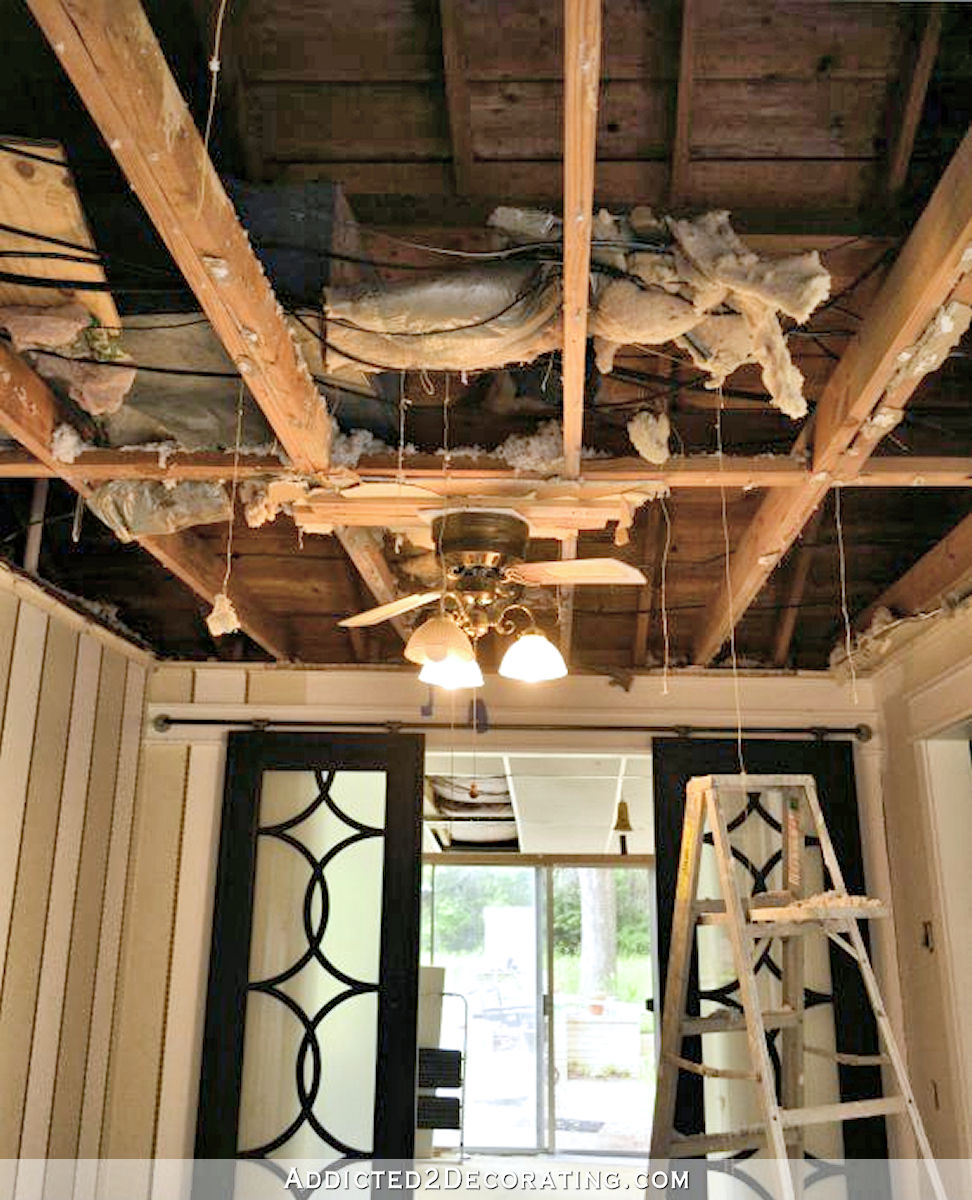
April 27, 2015
My father-in-law came for a visit, and he helped me take down all of the drywall on the ceiling in the music room (and entryway, and living room) and install new drywall. This should have been done right from the beginning, but as I mentioned above, I was trying to avoid it. There came a point when it couldn’t be avoided any longer, though.
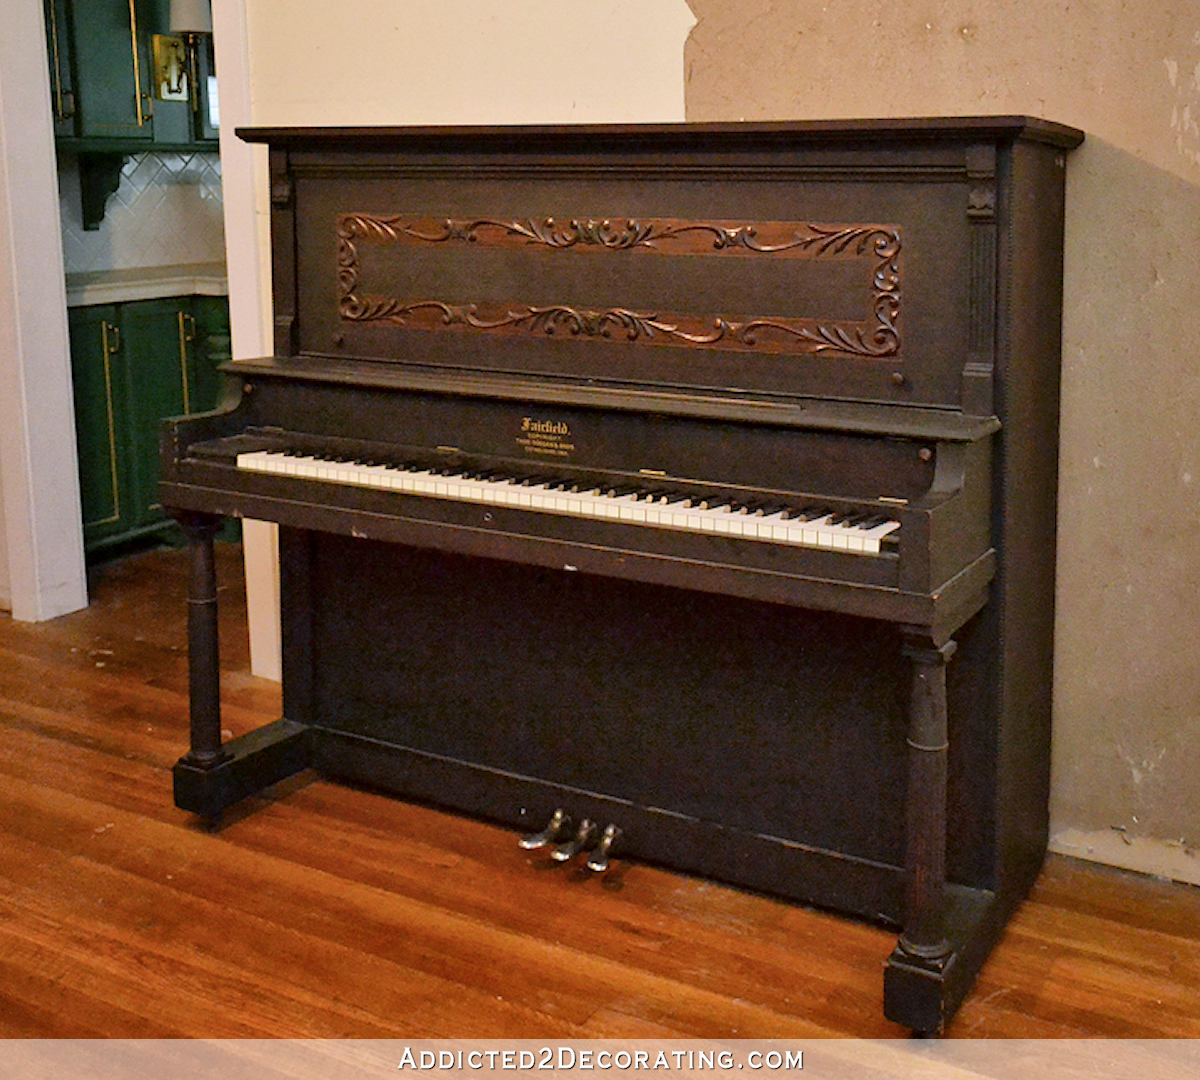
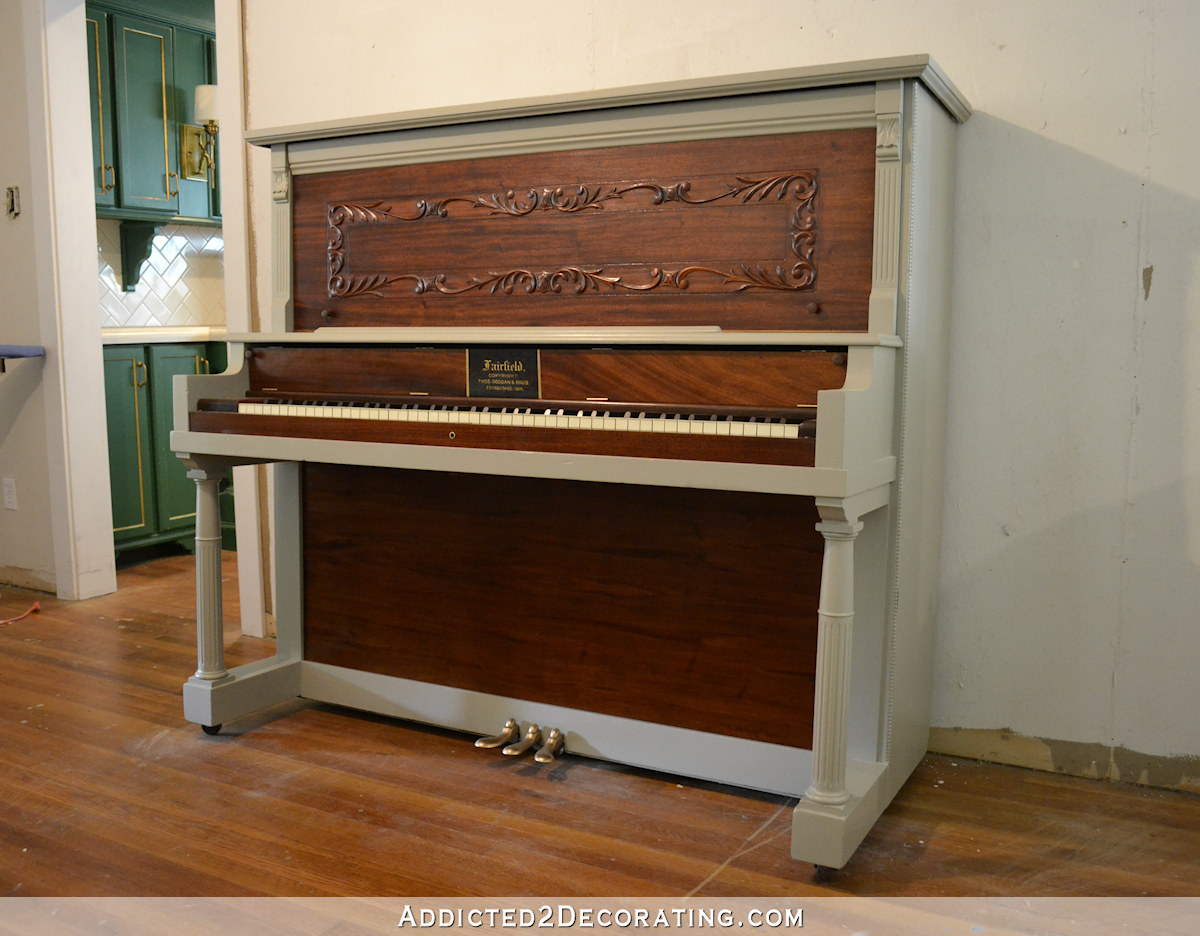
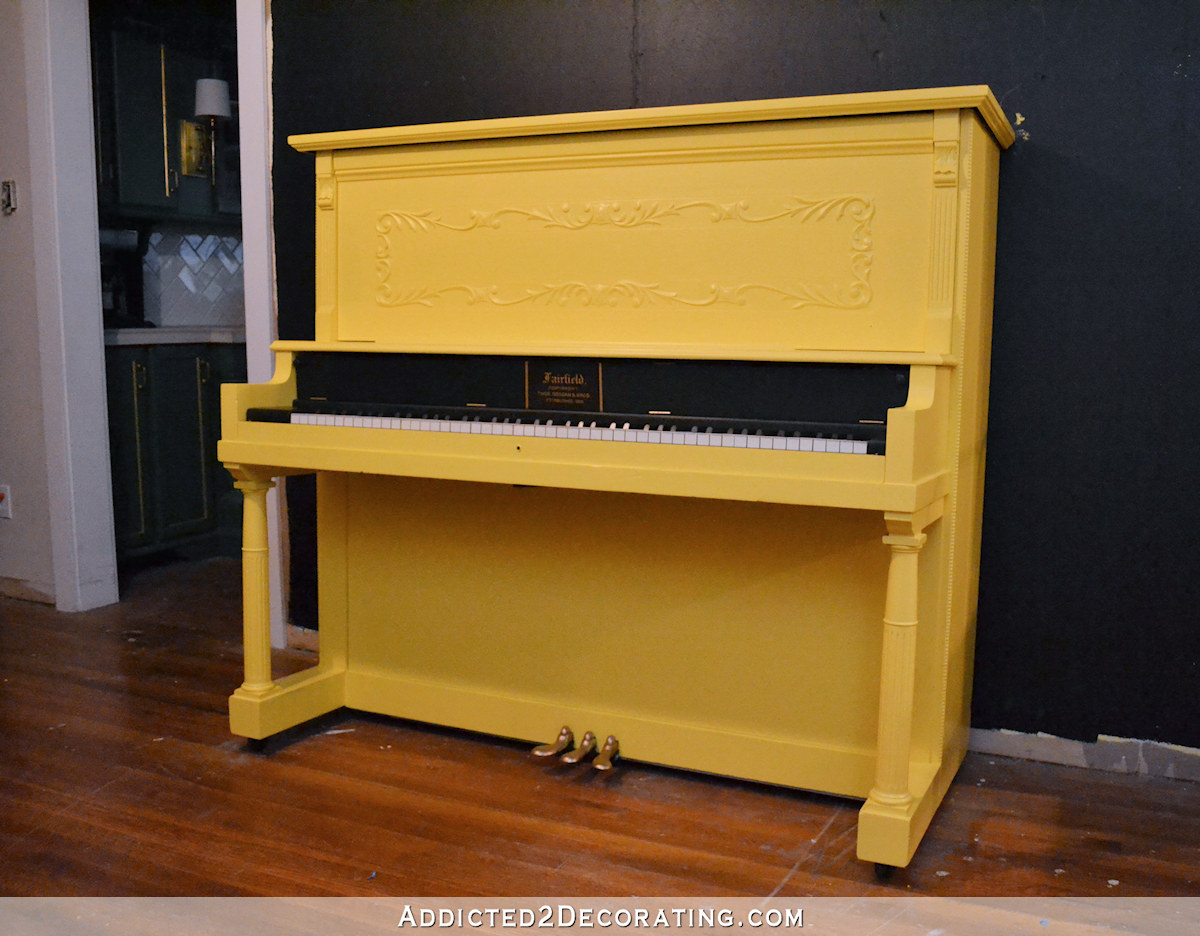
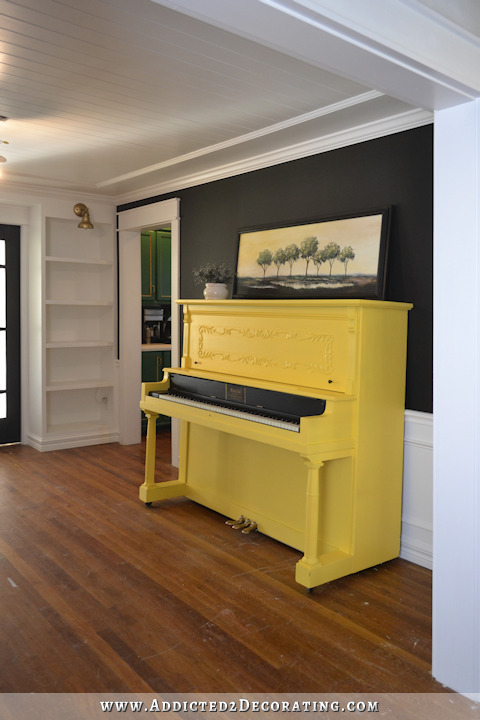
August 2015
Since my piano was in storage three hours away, and I had no idea when I would be able to get it, I needed a piano for my music room. I found a beautiful one that was listed for free, and I only had to pay to have to moved. After it sat in my music room untouched for a month, I decided to refinish it by stripping and staining part of it and painting other parts of it. It turned out beautiful, but it didn’t really seem like it fit my style. So then I painted the entire thing bright yellow. It didn’t really fit my style, either, but it was a little bit closer. The yellow was too bright even for my taste, though.
September 2015
The walls in the music room (and the entryway and living room) finally got new drywall. Our house was built during the time when they put shiplap (or 1″ x 10″s in this case) under the drywall. Could you even imagine how much this would cost right now with the current price of lumber?
November 2015
I know that I had a good reason for doing this (in my mind at the time), but I decided that I needed to remove the pony walls and columns, and install French doors as sidelights to separate the rooms.
November 2015
By this time, I finally had vision for how to finish the sliding door wall. But it required much sturdier sliding door hardware than the cheap option I had previously used. So I removed that hardware, and used real barn door hardware. It wasn’t the pretty or fancy stuff, because it was going to be hidden anyway. This was real hardware that you’d use on an actual door of a barn.
December 2015
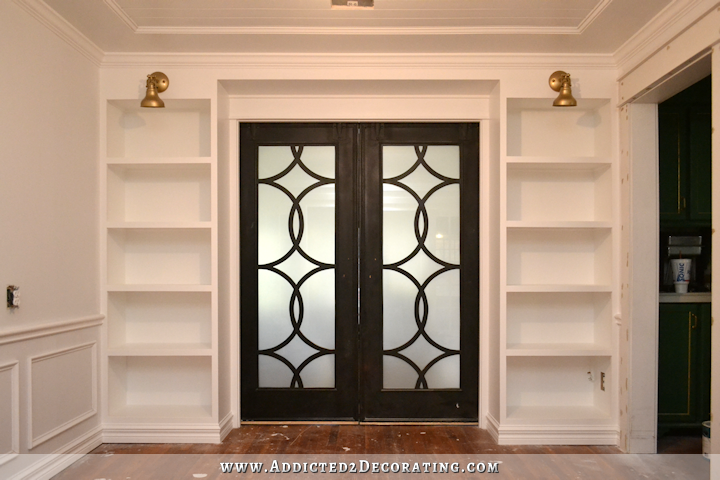
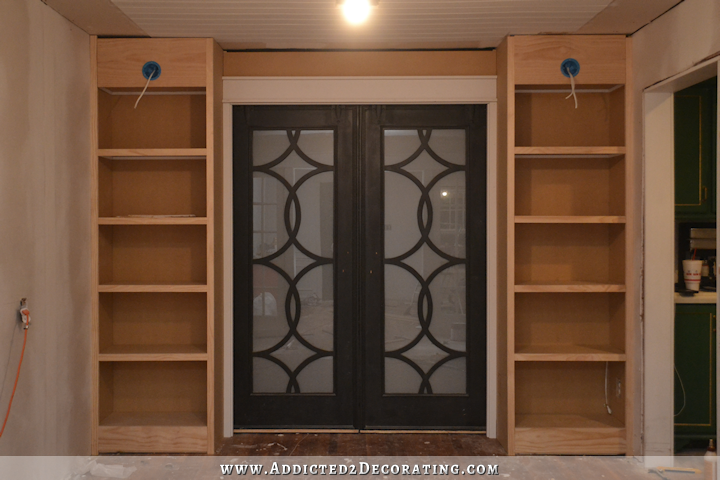
In November 2015, I started building the bookcases flanking the sliding doors. This project took a while, but I had them finished in December. I built the bookcases so that they stood about four inches from the wall. That way the doors could slide into the space between the bookcases and the wall and act as pocket doors.
December 2015
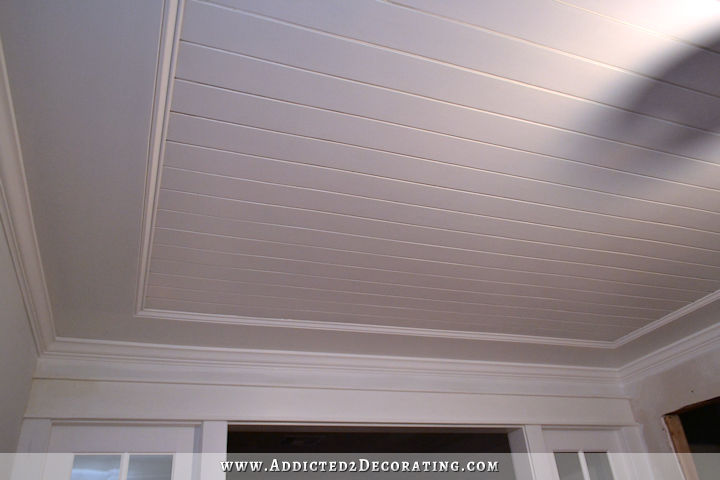
This project took me two month, but in December, I finally finished the planked ceiling in the music room.
January 2016
By the end of January, all of the big construction projects were done, and I moved the piano into place. My vision for the room at that time was starting to fall into place.
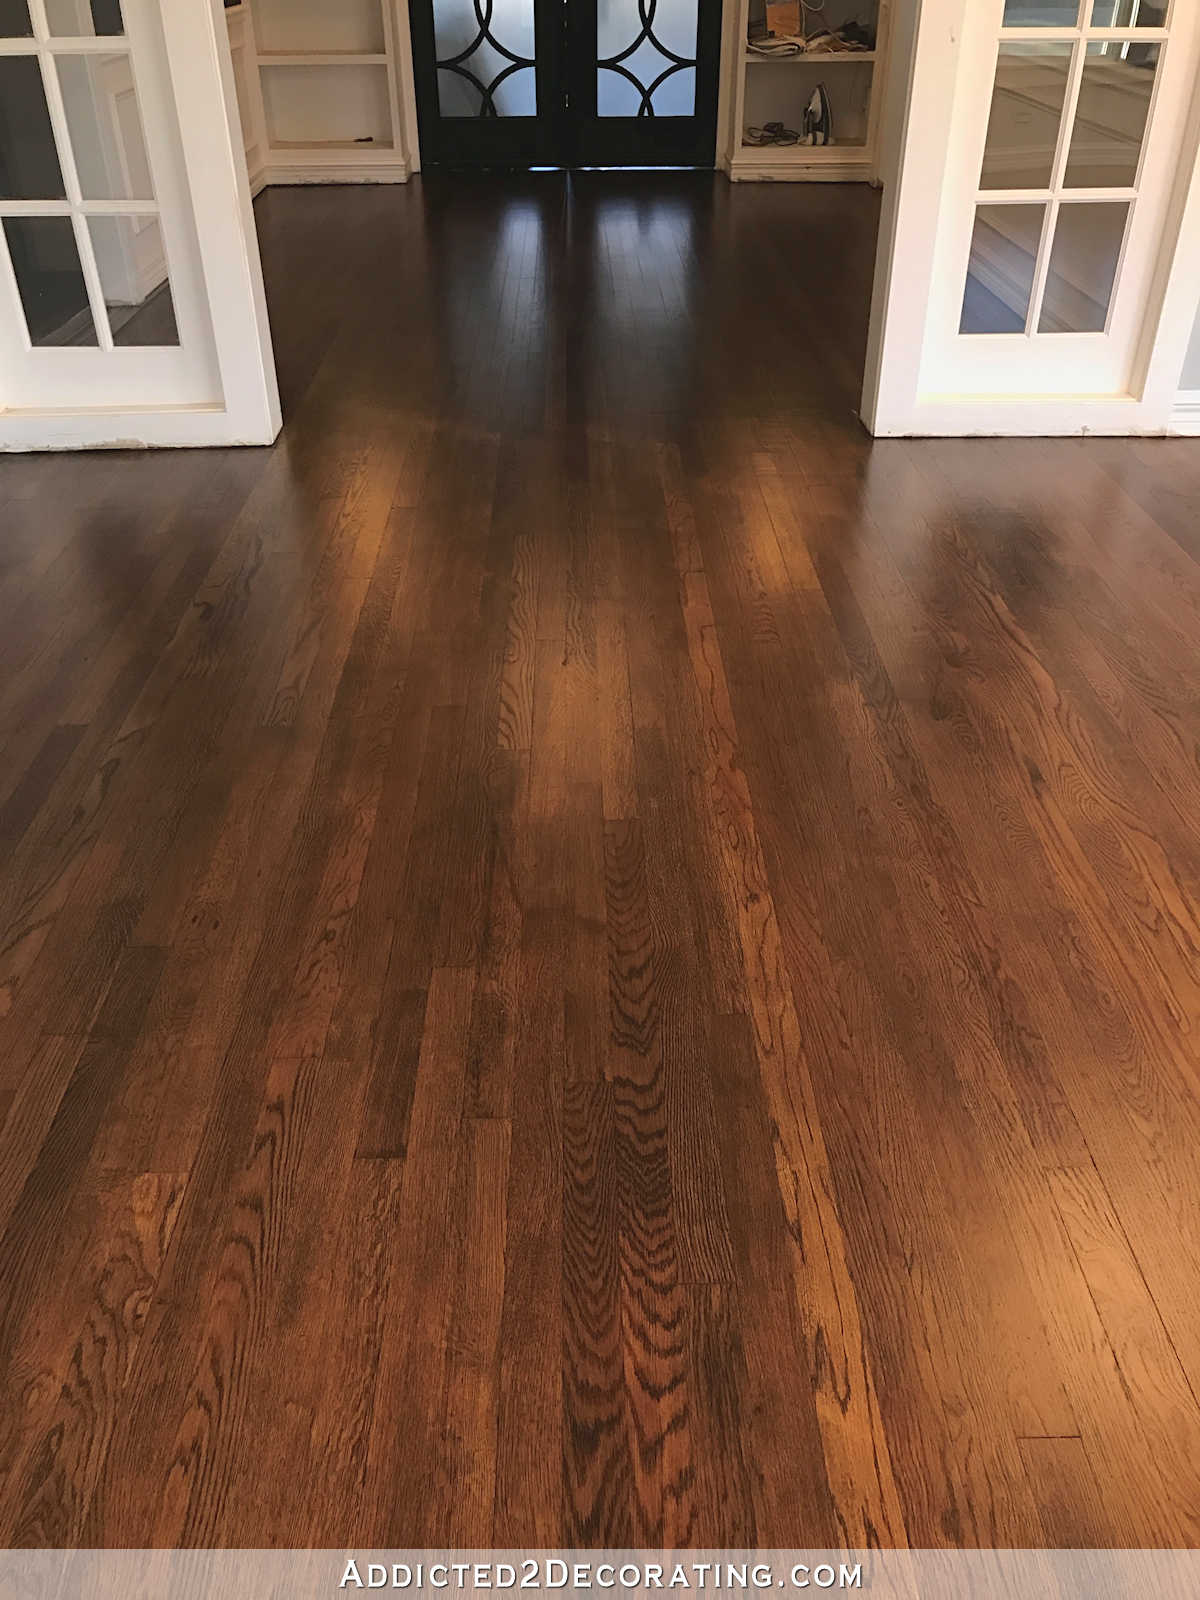
February 2017
After living with the floors finished with Waterlox for 3.5 years, I decided that they were way too orange for my taste. So I sanded and refinished the floors a second time, this time using Minwax stain and polyurethane. This color was way more to my liking.
March 2017
I finally got my piano! It had been in storage about a 3.5-hour drive away (7 hour round trip), and it had been in storage for years. I had no idea when I’d be getting it (it was actually in my sister’s storage), so it was a surprise when she called and said they’d be clearing out the storage and could bring it to me.
June 2017
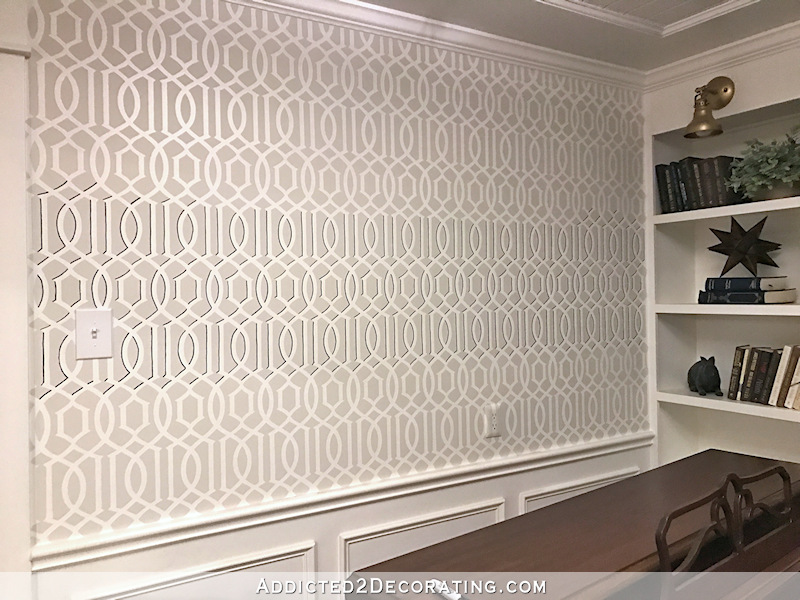
In all of my 20+ years of DIYing, I had never tried stenciling a wall until now. And when the walls in this room were done, I swore that I’d never do it again. Hanging wallpaper is so much easier and faster!

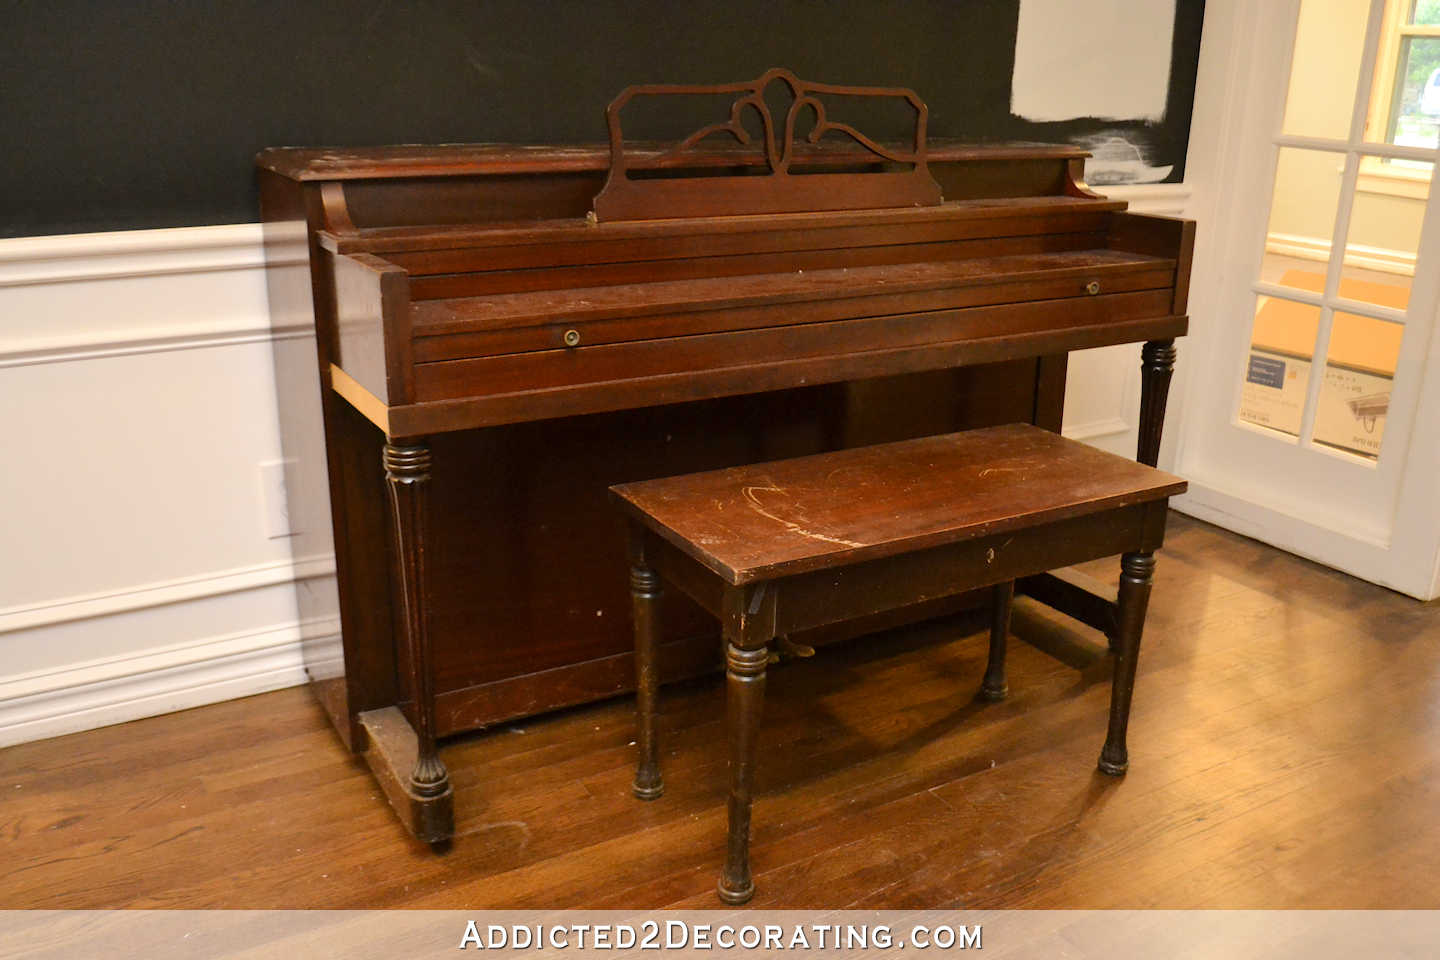
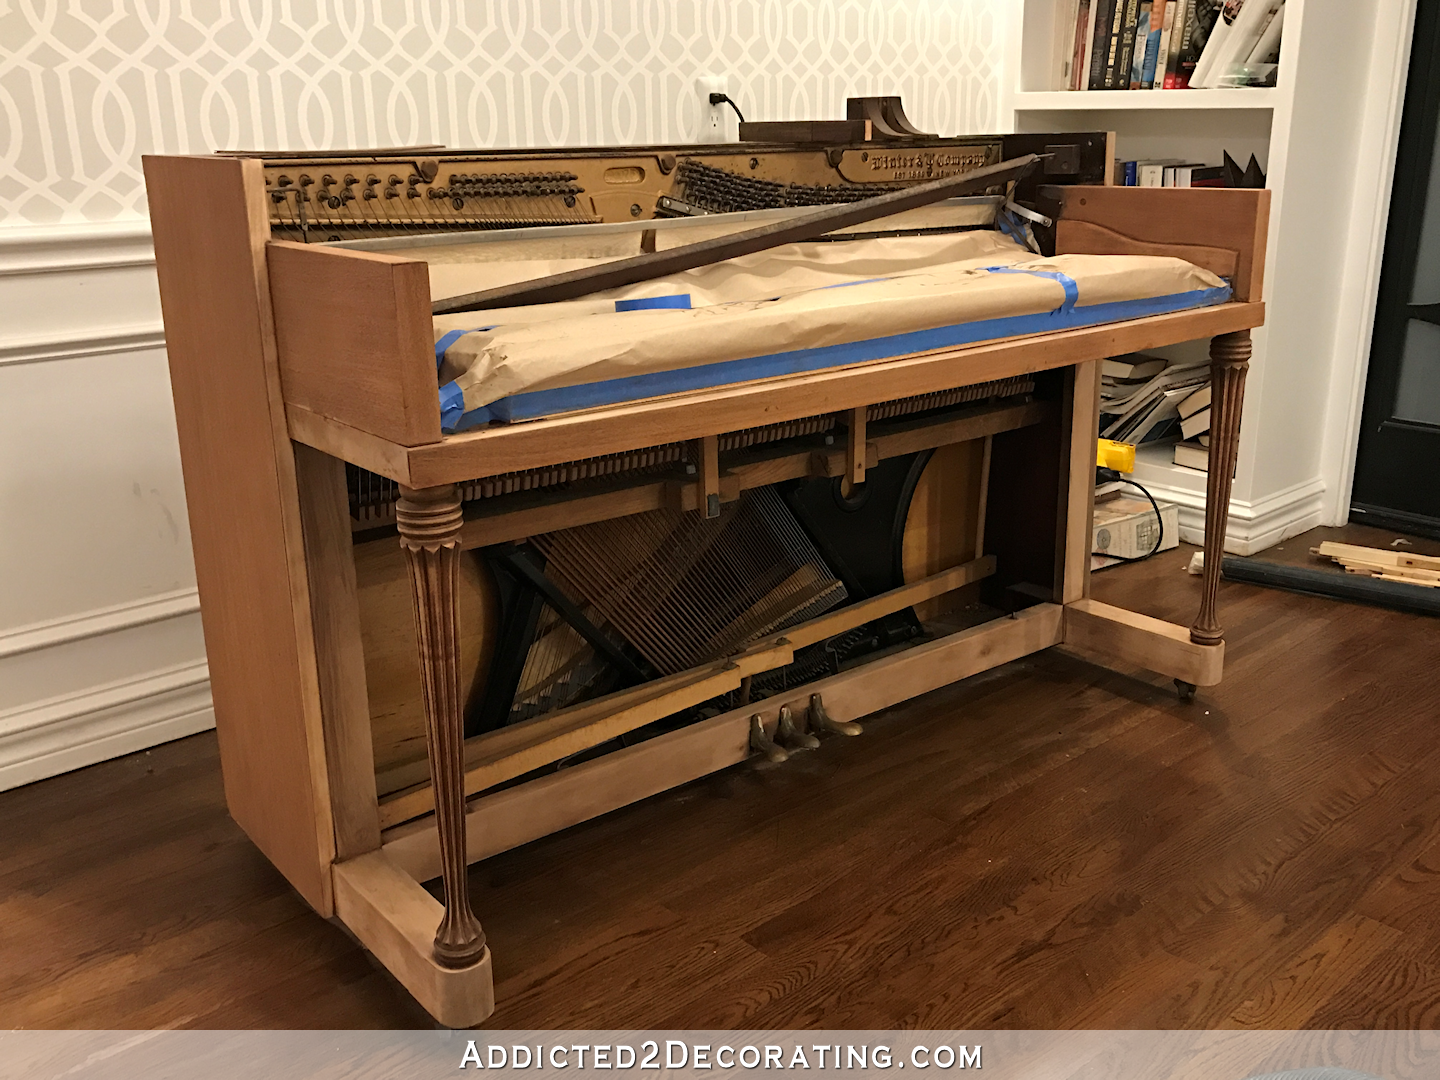
October 2017
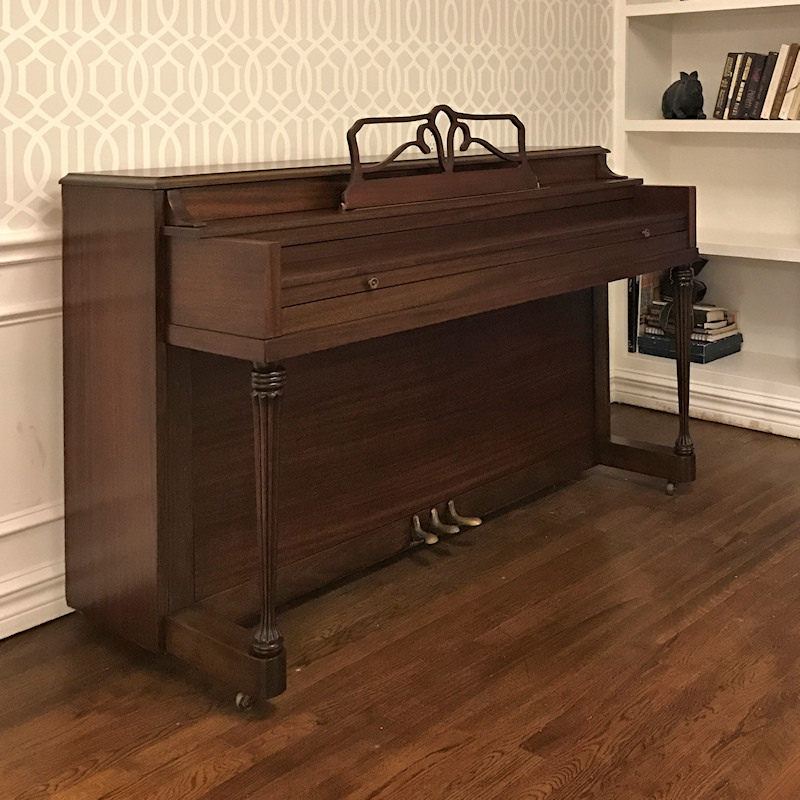
My little spinet piano finally got a much needed makeover. I had promised my mom that I wouldn’t paint it (this was the piano that she learned to play on when she was a young girl, and I also learned to play on it when I was little), so I embarked upon the very tedious and time-consuming process of taking everything apart, stripping every piece, refinishing everything, and putting it all back together. At one point, I had even removed all of the keys and had them piled in a box. I didn’t actually finish the whole project until January 2018, but I did the bulk of it in October 2017.
January 2018
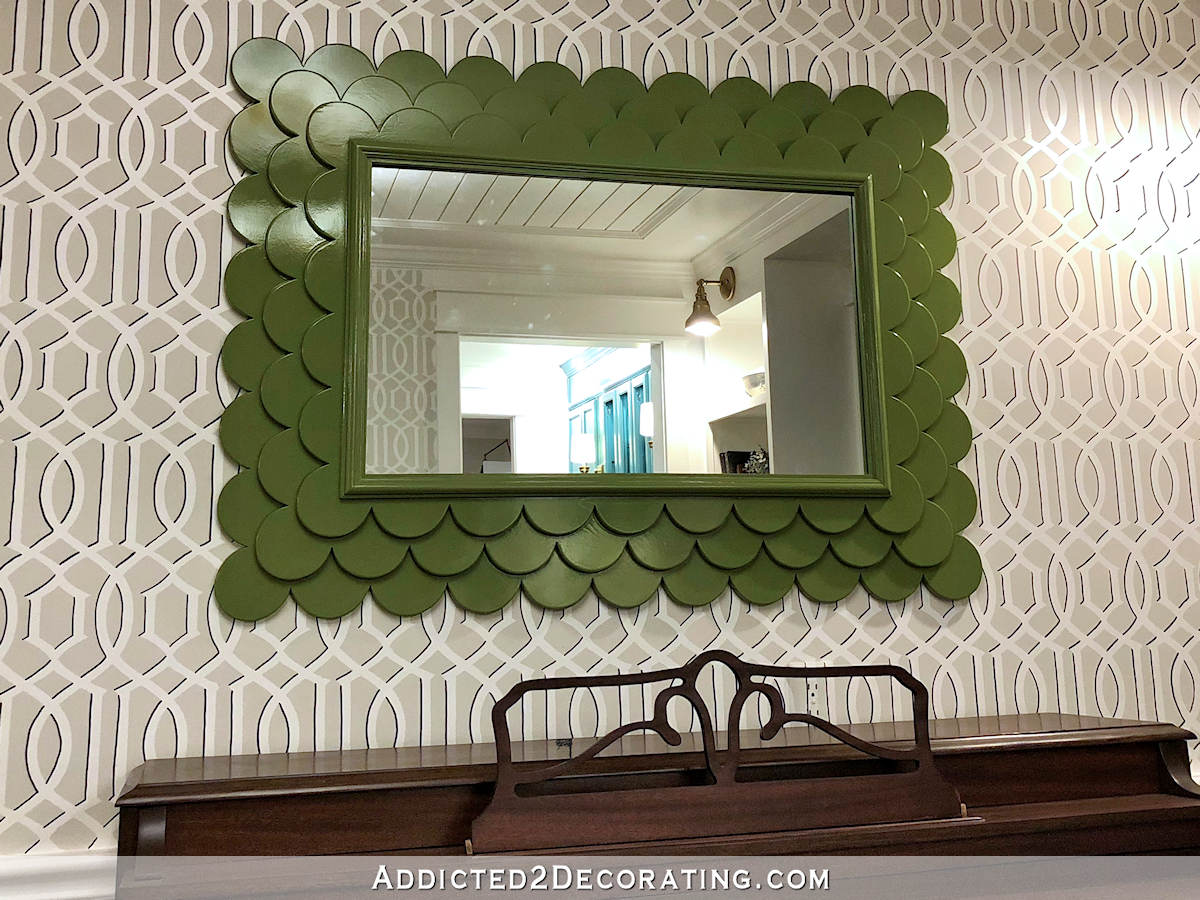
While I liked the two-color stencil on the music room walls, it seemed to be lacking some oomph. So using a black Sharpie marker, I added some black lines in selective areas to highlight the design. The photo below shows the “in progress” design change. I was shocked at how much of a difference some black lines made.
January 2020
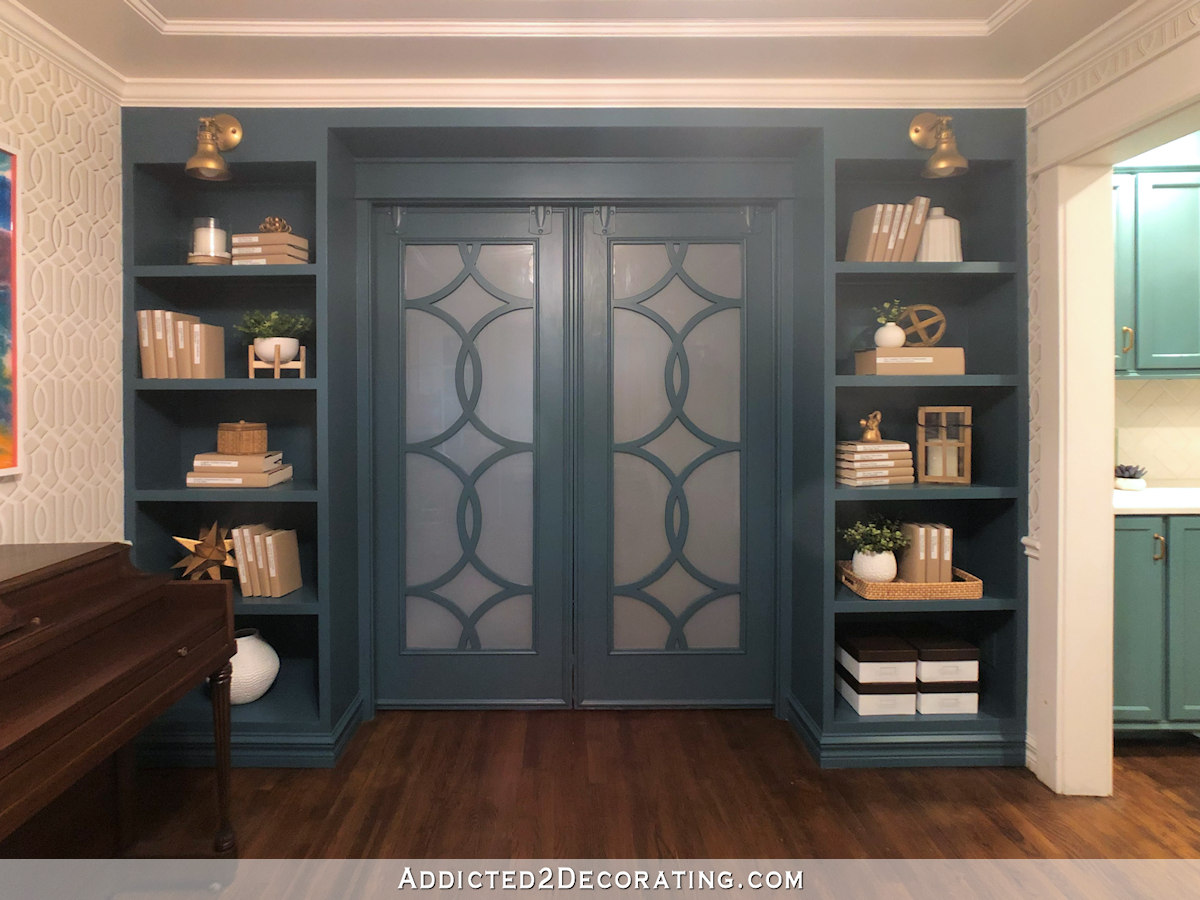
I decided that the white bookcases and black doors in the music room needed to be the same dark teal. I used the same teal on these that I used on the pantry cabinets — Behr Mythic Forest. It’s been one of my favorite paint colors ever since the condo days. At this point, the room was so close to being finished! I just needed seating, end tables, lamps, and a few finishing touches.
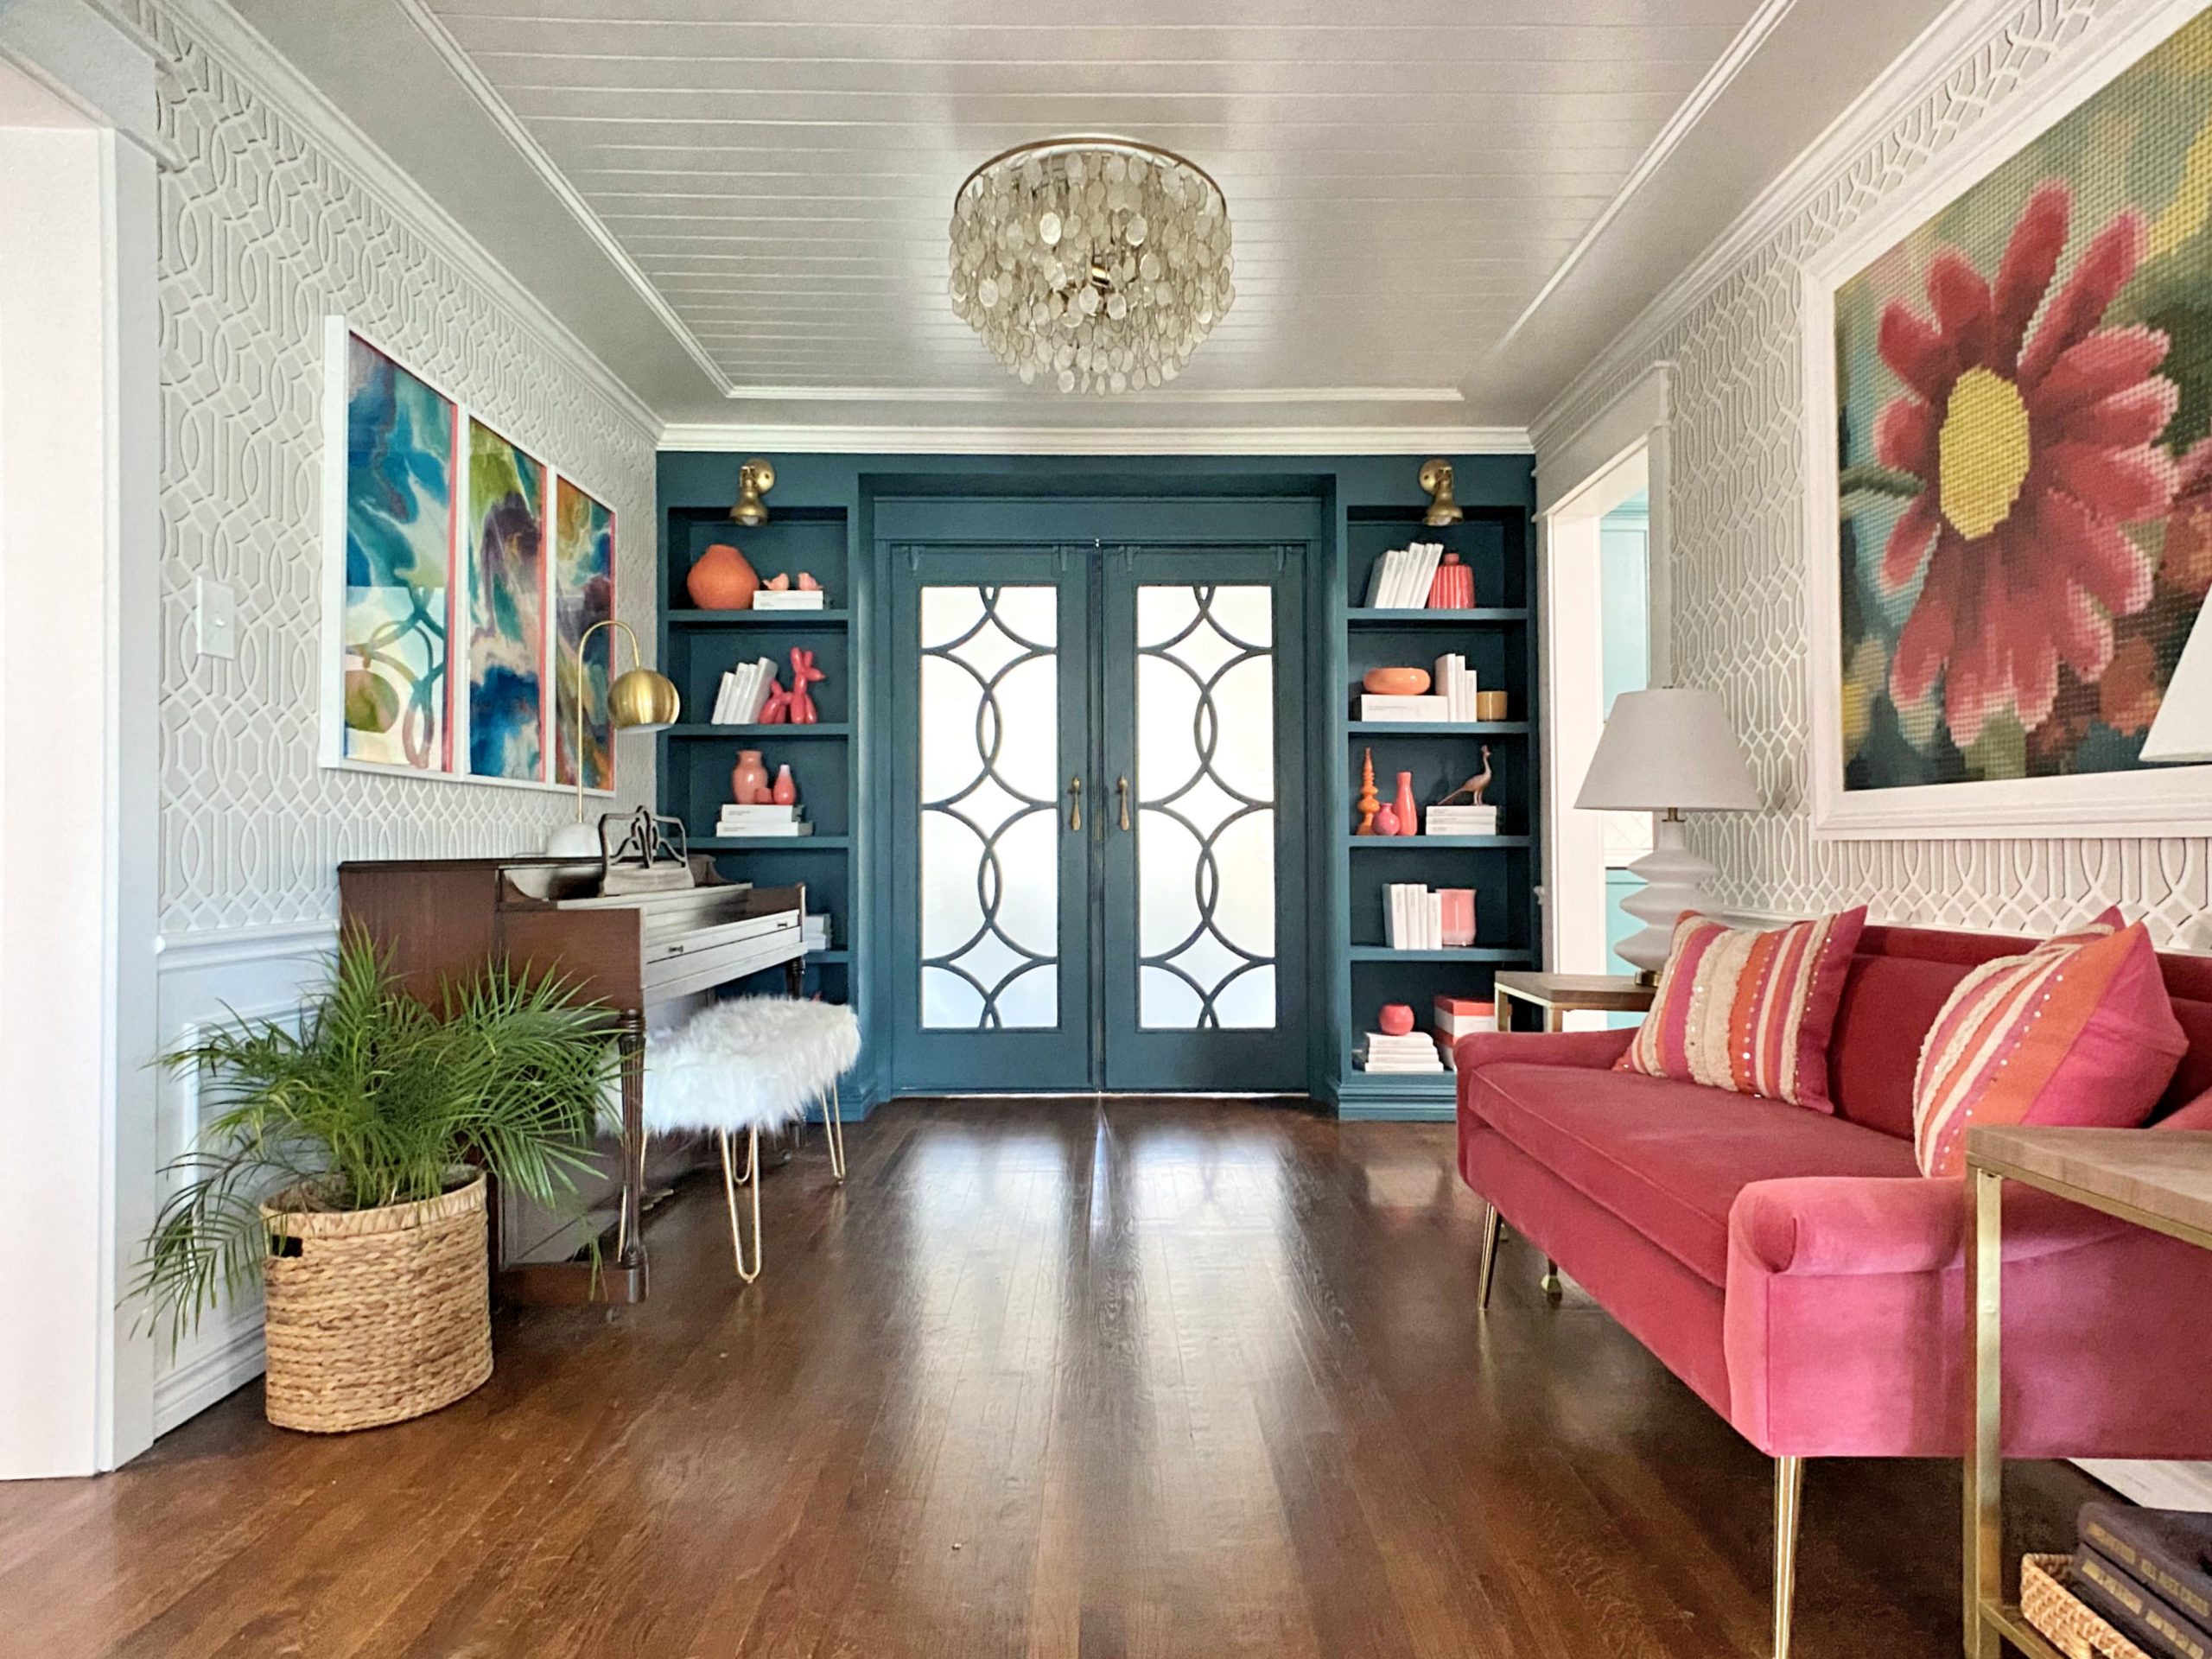
May 2021
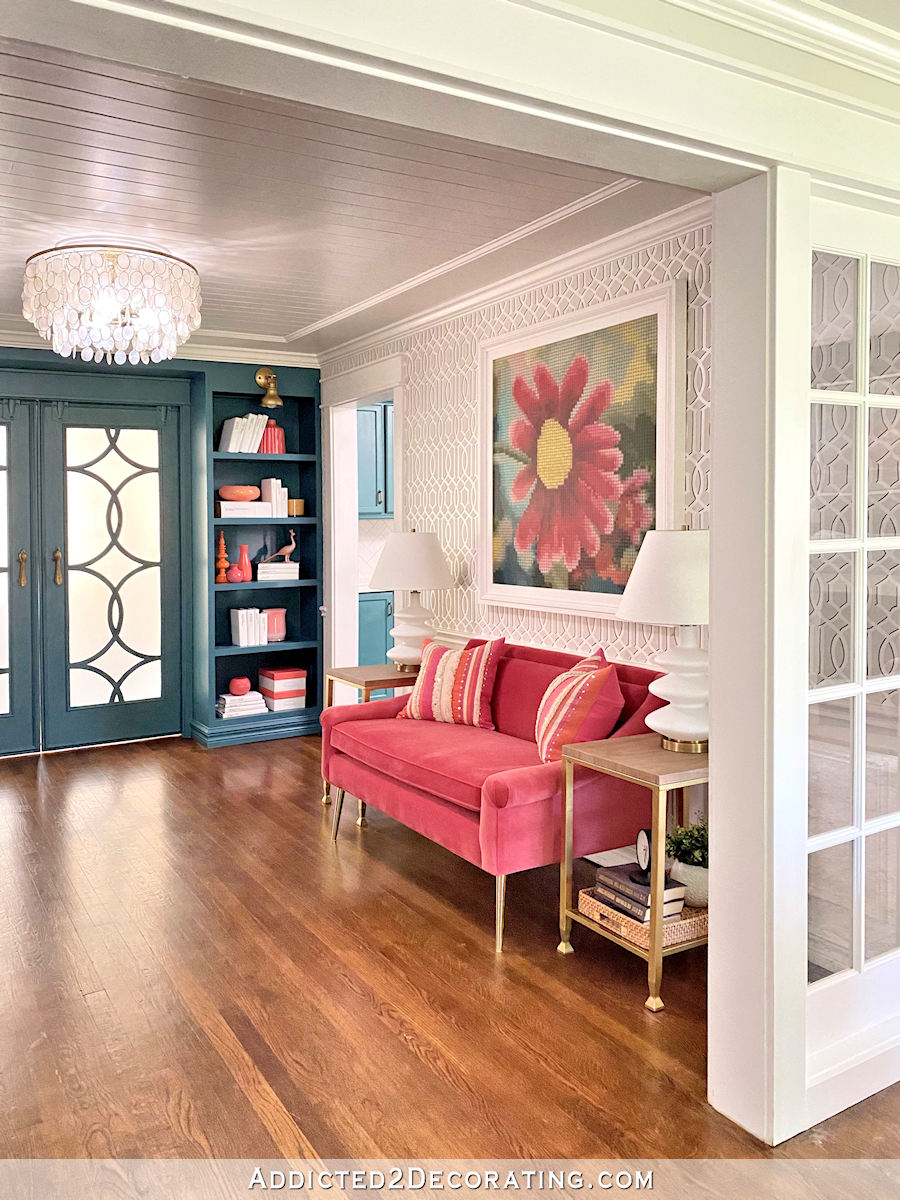
The room is finally finished, with the addition of a colorful settee, two end table makeovers, two new lamps, a new piano bench, a large pretty plant (that I hope I can keep alive), and a bookcase refresh using white book covers and lots of latex and spray paint.
There was definitely nothing fast or focused about this room remodel, but as you can see, there weren’t nearly as many false starts and changes of direction in this room as there were in the living room. The problem with this room was more that I could always find other projects that were a higher priority, so this room was continually moved to the back burner. I’d get one project done, and then step away for a month. Then I’d do something else in here, and step away for several months.
At the beginning of 2021, I decided it had been drawn out long enough, and the room was so close to being finished that if I made a concerted effort to put the final touches on the room, I could call it finished. And I’m so glad I did! Walking through my front door and seeing a finished room filled with color puts a smile on my face every time. And I have to admit, this settee just might be my favorite thing in my whole house.
I touched on the highlights in this post, but I skipped over a whole lot. You can click here to see all of the posts about this music room from beginning to end.

Addicted 2 Decorating is where I share my DIY and decorating journey as I remodel and decorate the 1948 fixer upper that my husband, Matt, and I bought in 2013. Matt has M.S. and is unable to do physical work, so I do the majority of the work on the house by myself. You can learn more about me here.


I am so happy for you. After 8 years, I bet you are so glad to see the fruits of your labor in the finished main areas of your house. And I bet it serves as motivation for other areas. I did this in my last house. Spent the first few years doing a blanket overhaul, then took the next few years nailing down the details. The details are what makes the house! You should be so proud of yourself. This hasn’t been a “cosmetic” renovation, but pretty much a full gut rebuilt mostly with only your own hands. You deserve this. I can’t wait to see the studio and master suite finished up.
Wow Kristi it’s so satisfying to see each finish line being crossed!
Agreed, your home has been way more of a gut rebuild than a renovation. It’s funny how you start to forget the original details until you look back at photos. I wonder what the previous owners would think to see it now. You are amazing, and an inspiration, Kristi!
Curious…. do you like the glass panels better than the pony walls. Frankly I don’t know what I prefer. Looks awesome.
I thought that I liked them better, but when I looked back at the photos of the pony wall and columns, I really missed those. I think I like them about equally. I do like that the music room settee shows through the glass of the sidelights, where it wouldn’t show as much with the pony wall there. So I guess that’s one advantage of the current design.
Where did you get the gorgeous pick couch? Did I miss that in the post?
It’s from Amazon. Here’s my affiliate link: https://amzn.to/3c1rlxP
I also loved the bird mural and the pony walls a lot, but I do like the French door sidelights a bit better there. Kind of closes off the music room just a bit for coziness while still keeping the openness and light. The end result of all your work is stellar! Love the colors and the plan you are heading for.
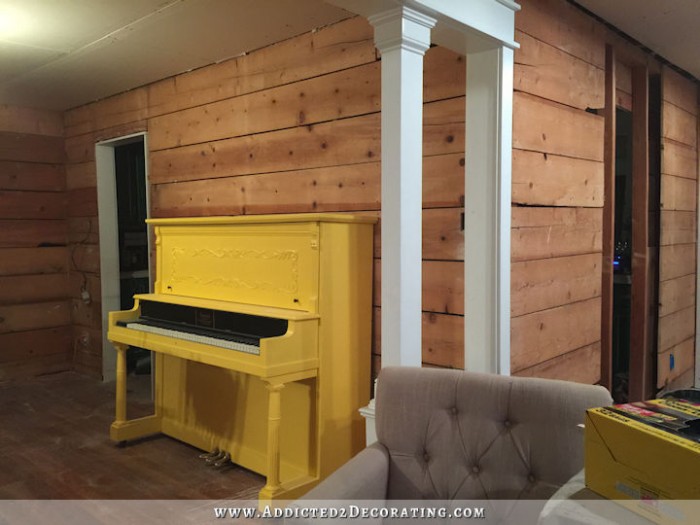
What happened to the yellow piano?!?!?!?
It’s sitting in the sunroom. 🙂 I need to list it, and I’ll probably just give it away. The problem is that a free piano is never free, because you have to hire someone who can actually transport a piano.
I still like that yellow piano! 🙂 But yeah, I suppose living with it would be a bit too much for me too. It was a great effort though. And I love all the final details in this room!
Wow! I just don’t know what to say! The changes are amazing! I love it! I also love that settee! And…the pillows go fabulous with all of it! It’s just beautiful!
It’s such a luscious and lovely room. I can only imagine how inspiring it must be to sit and play piano there while surrounded by such beauty. 🙂
You are truly amazing. You are a perfectionist. I am also a perfectionist but in recovery as I have found it is not always the answer to a stress free life. But then again when it comes to renovating and decorating my own home then I too strive for perfection. Your music room is such a delight. I hope you have some time to sit at that lovely piano and invite some friends over for a musical evening and glass of wine to thoroughly enjoy your beautiful music room.
Your music room looks wonderful. It was a journey and you got where you wanted to. And hey- bonus – we got to ride along. Thank you!
I think the French door dividers are perfect.- they add division but in a sophisticated way that complements the sliding back wall doors. The pony wall dividers were architecturally interesting but IMO too heavy for this area. So no regrets.
Always enjoy reading about what you are doing.
The sliding doors, the bird mural, and the pony walls are my favorites of all your projects. I seem to remember that between the pony walls and the sidelights you put up all the molding and there was a bit of an issue with how the molding met the pony walls (they bumped out a bit from the wall to the right or something). I think you resolved it somehow and it wasn’t the cause of you taking them down. In any case, I always appreciate that you just keep on trucking when you don’t like something. It’s kind of a curse/blessing to have so many skills and the fortitude to tackle just about anything. The rest of us would surely just accept the bad ceilings and drywall and rely on paint and maybe new floors to try to update.
It is stunning! So very you! And your big flower art piece is so perfect.
LOVE IT…!!!!